Wednesday, September 28, 2016

Buckle Castings in Precess


 I'm running through a series of buckles. You can see the progress from rough castings to ready to patina and the finished buckles ready for this weekend show, my website or my etsy store.  This first photo is mostly rough castings with some sanding already started
this second picture is casting mostly finished and ready for patina
Here is some of them finished and waxed and ready to go  
I took this Blue crab claw buckle to the next level by giving it Multiple layers of different patinas. Blues, greens, browns and some black. The final step is wax. The Wax actually saturates the colors and give it depth.
The blue crab claw buckle before patina started
:
I'm tempted to keep this one for myself. But I'll take it to the show this weekend to give other people a chance and put it on the etsy store and website next Monday if it doesn't sell. If you see it and want to claim it before the show on Saturday just contact me and I'll send it to you. It's 95.00

Thursday, May 5, 2016

Making Molds

One of the processes involved with making castings, if you want to make more than one, is making molds. I use a liquid room temperature Vulcanizing urethane or silicone. I use a semi clear formula that allows me to see the part as I cut it out of the mold. Otherwise I'm cutting blindly into block of rubber.
image

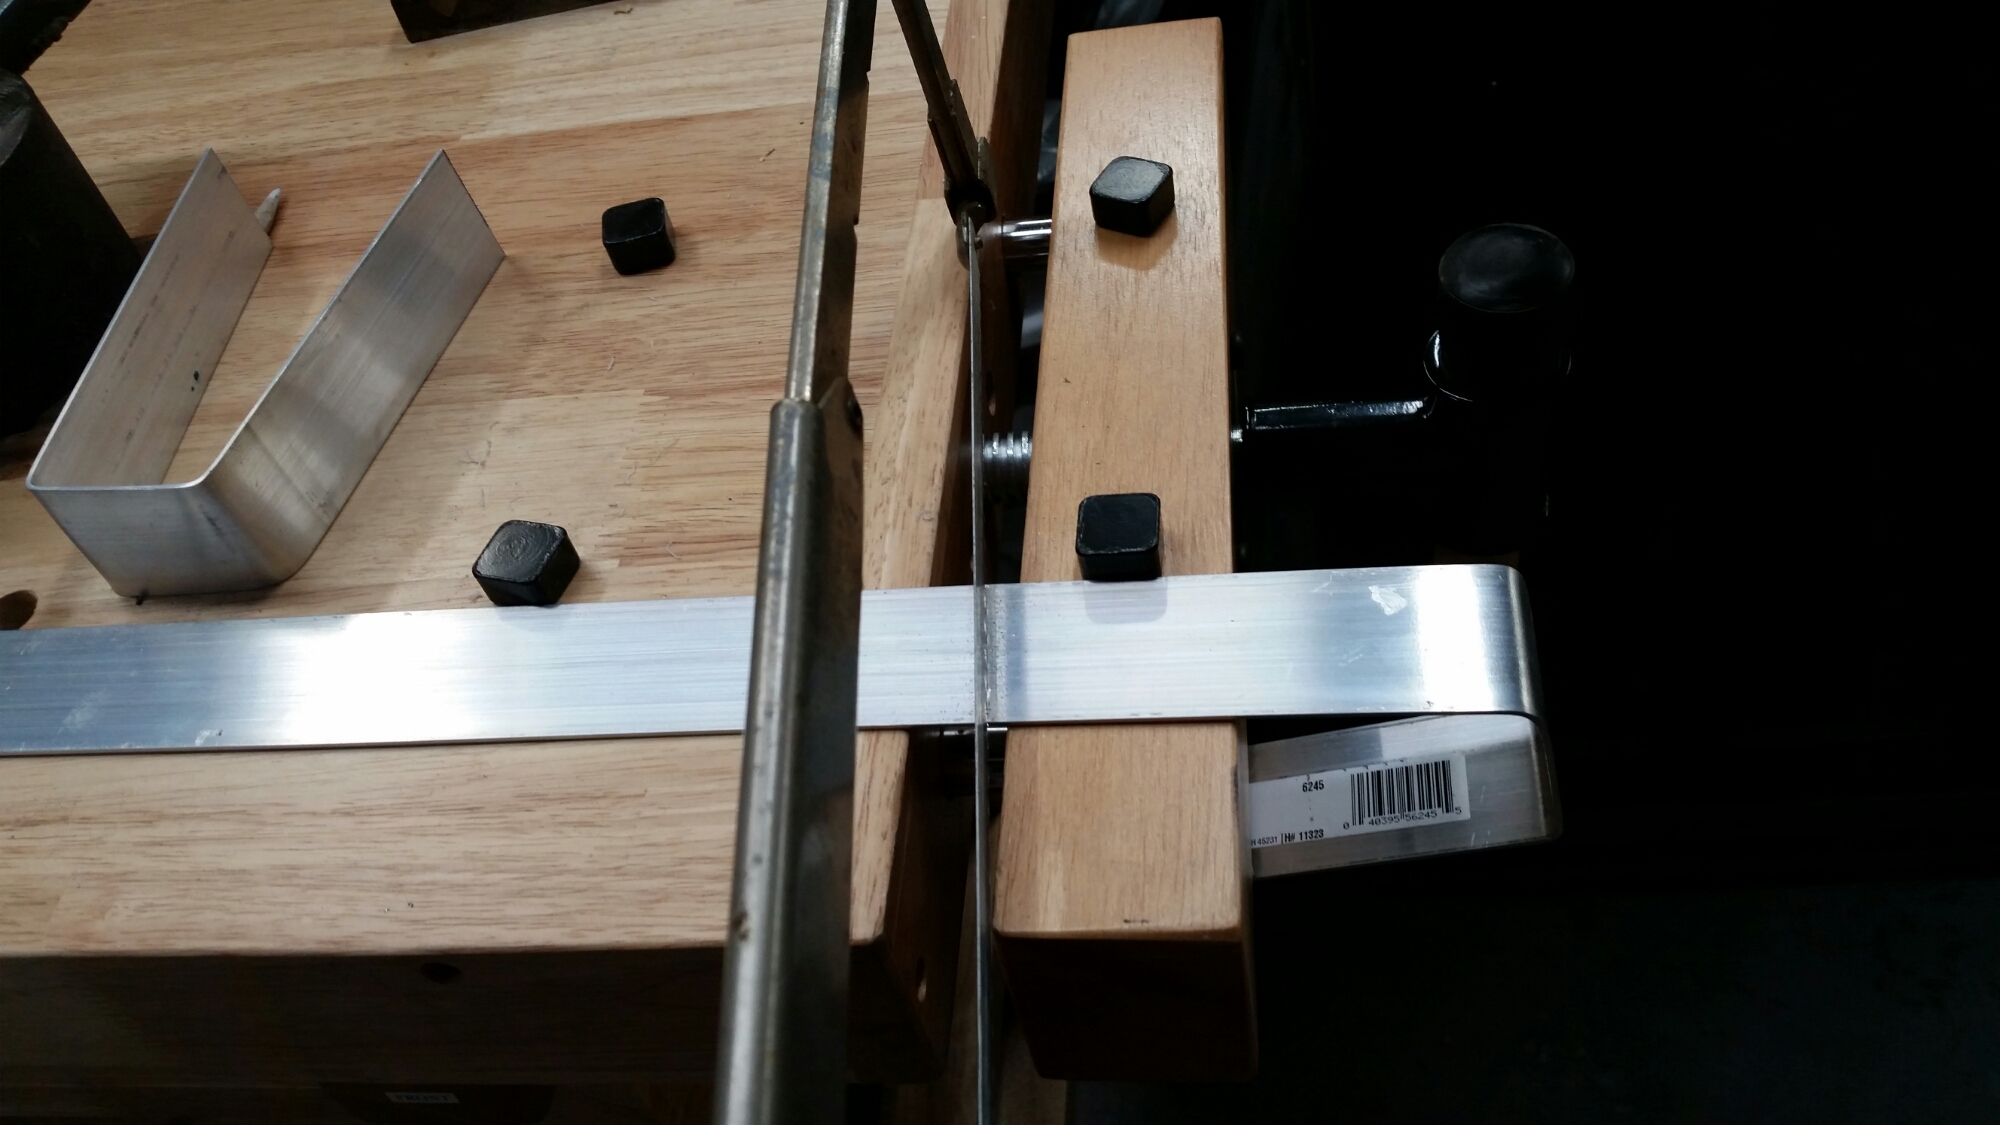
The first step is making the mold frame here I'm cutting a strip of aluminum and bending it into this U shape. I'll make a box out of this with two pieces of plexiglass, put my wax or metal model inside, fixed to the bottom and then pour the rubber around it.
image
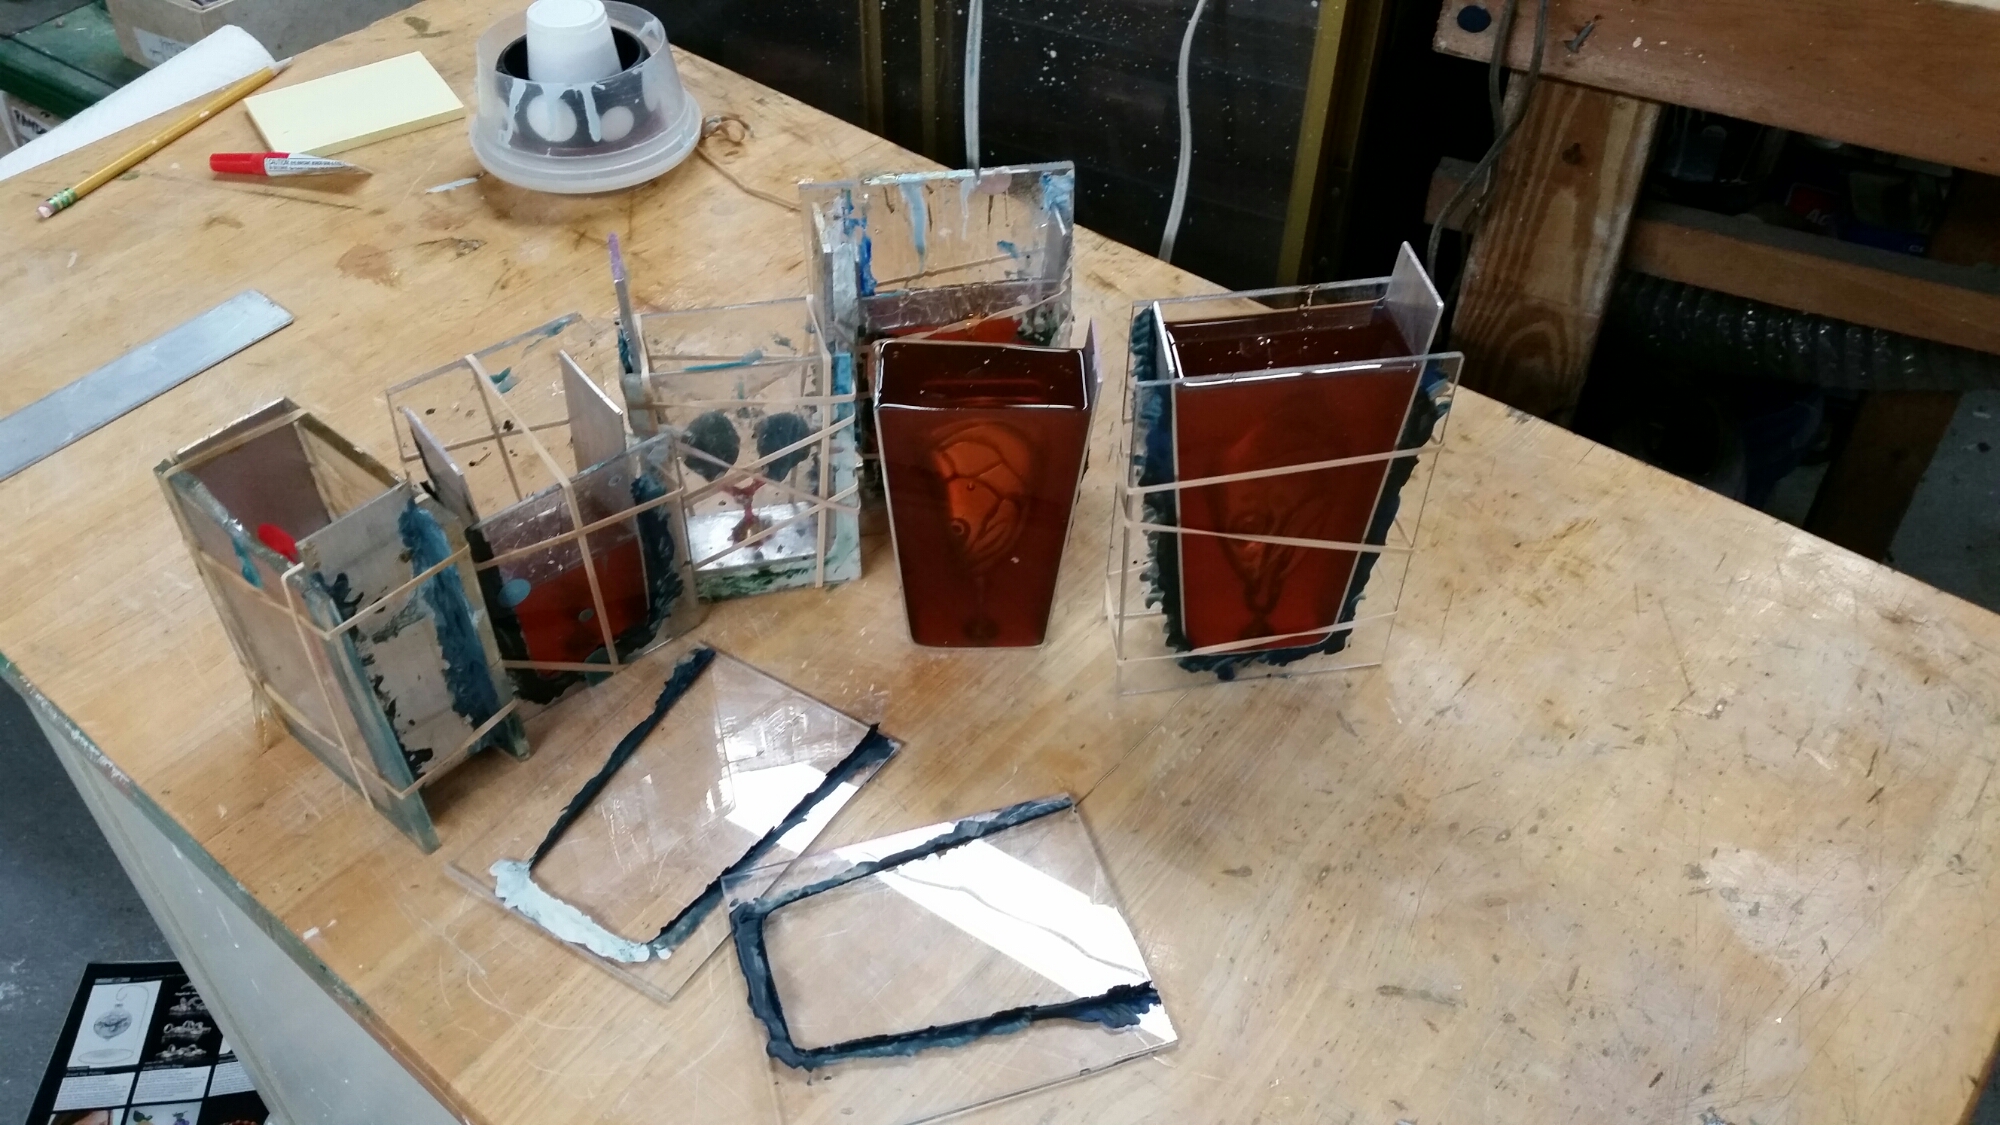
In the picture above, from left to right, you see the box sealed up and ready to pour next is one that is already been poured, in the middle is another one that is ready to pour, second from the right is a cured mold with the box removed and on the end, on the right, is one that's been poured and ready to de-mold
image
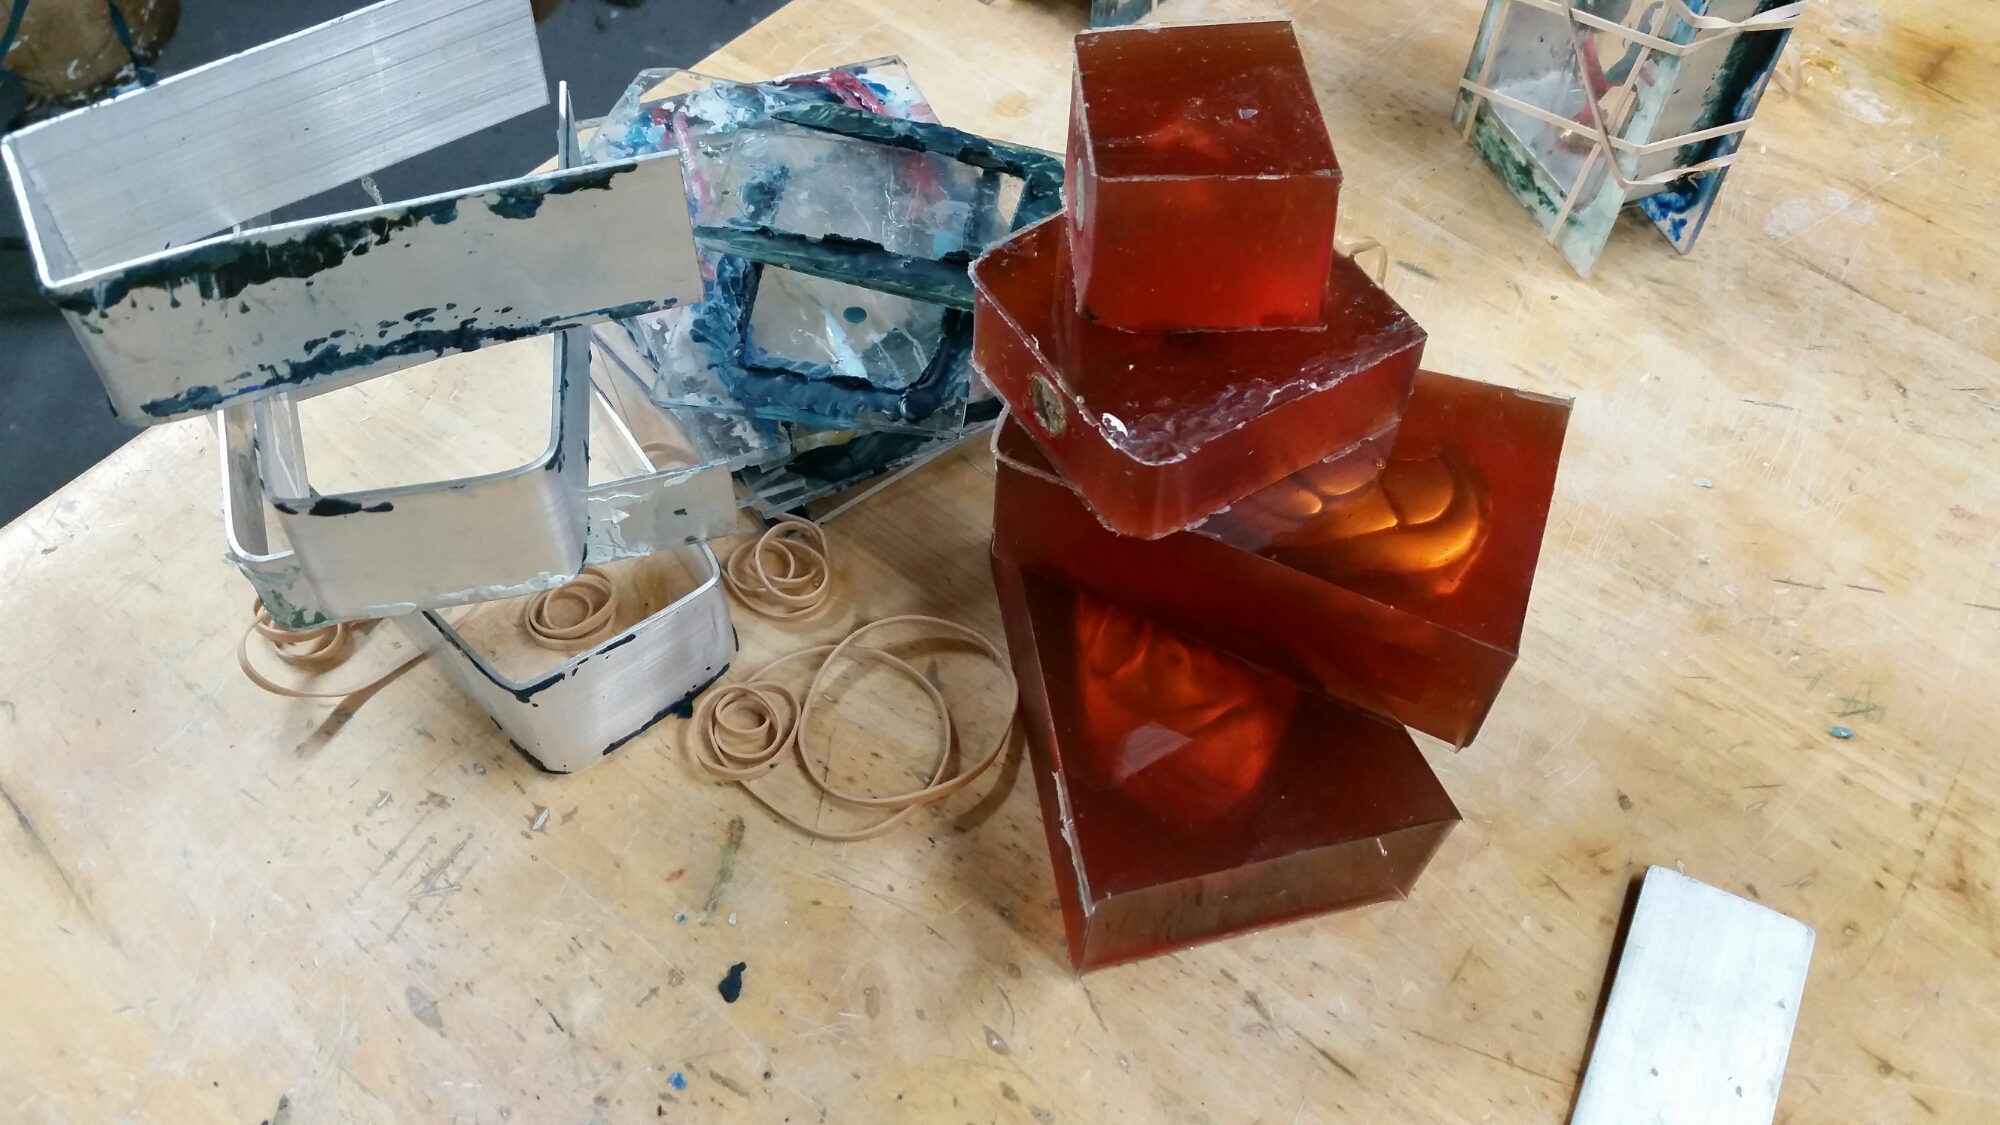
above  is a stack of molds ready to start cutting.
20160324_134700-1-1
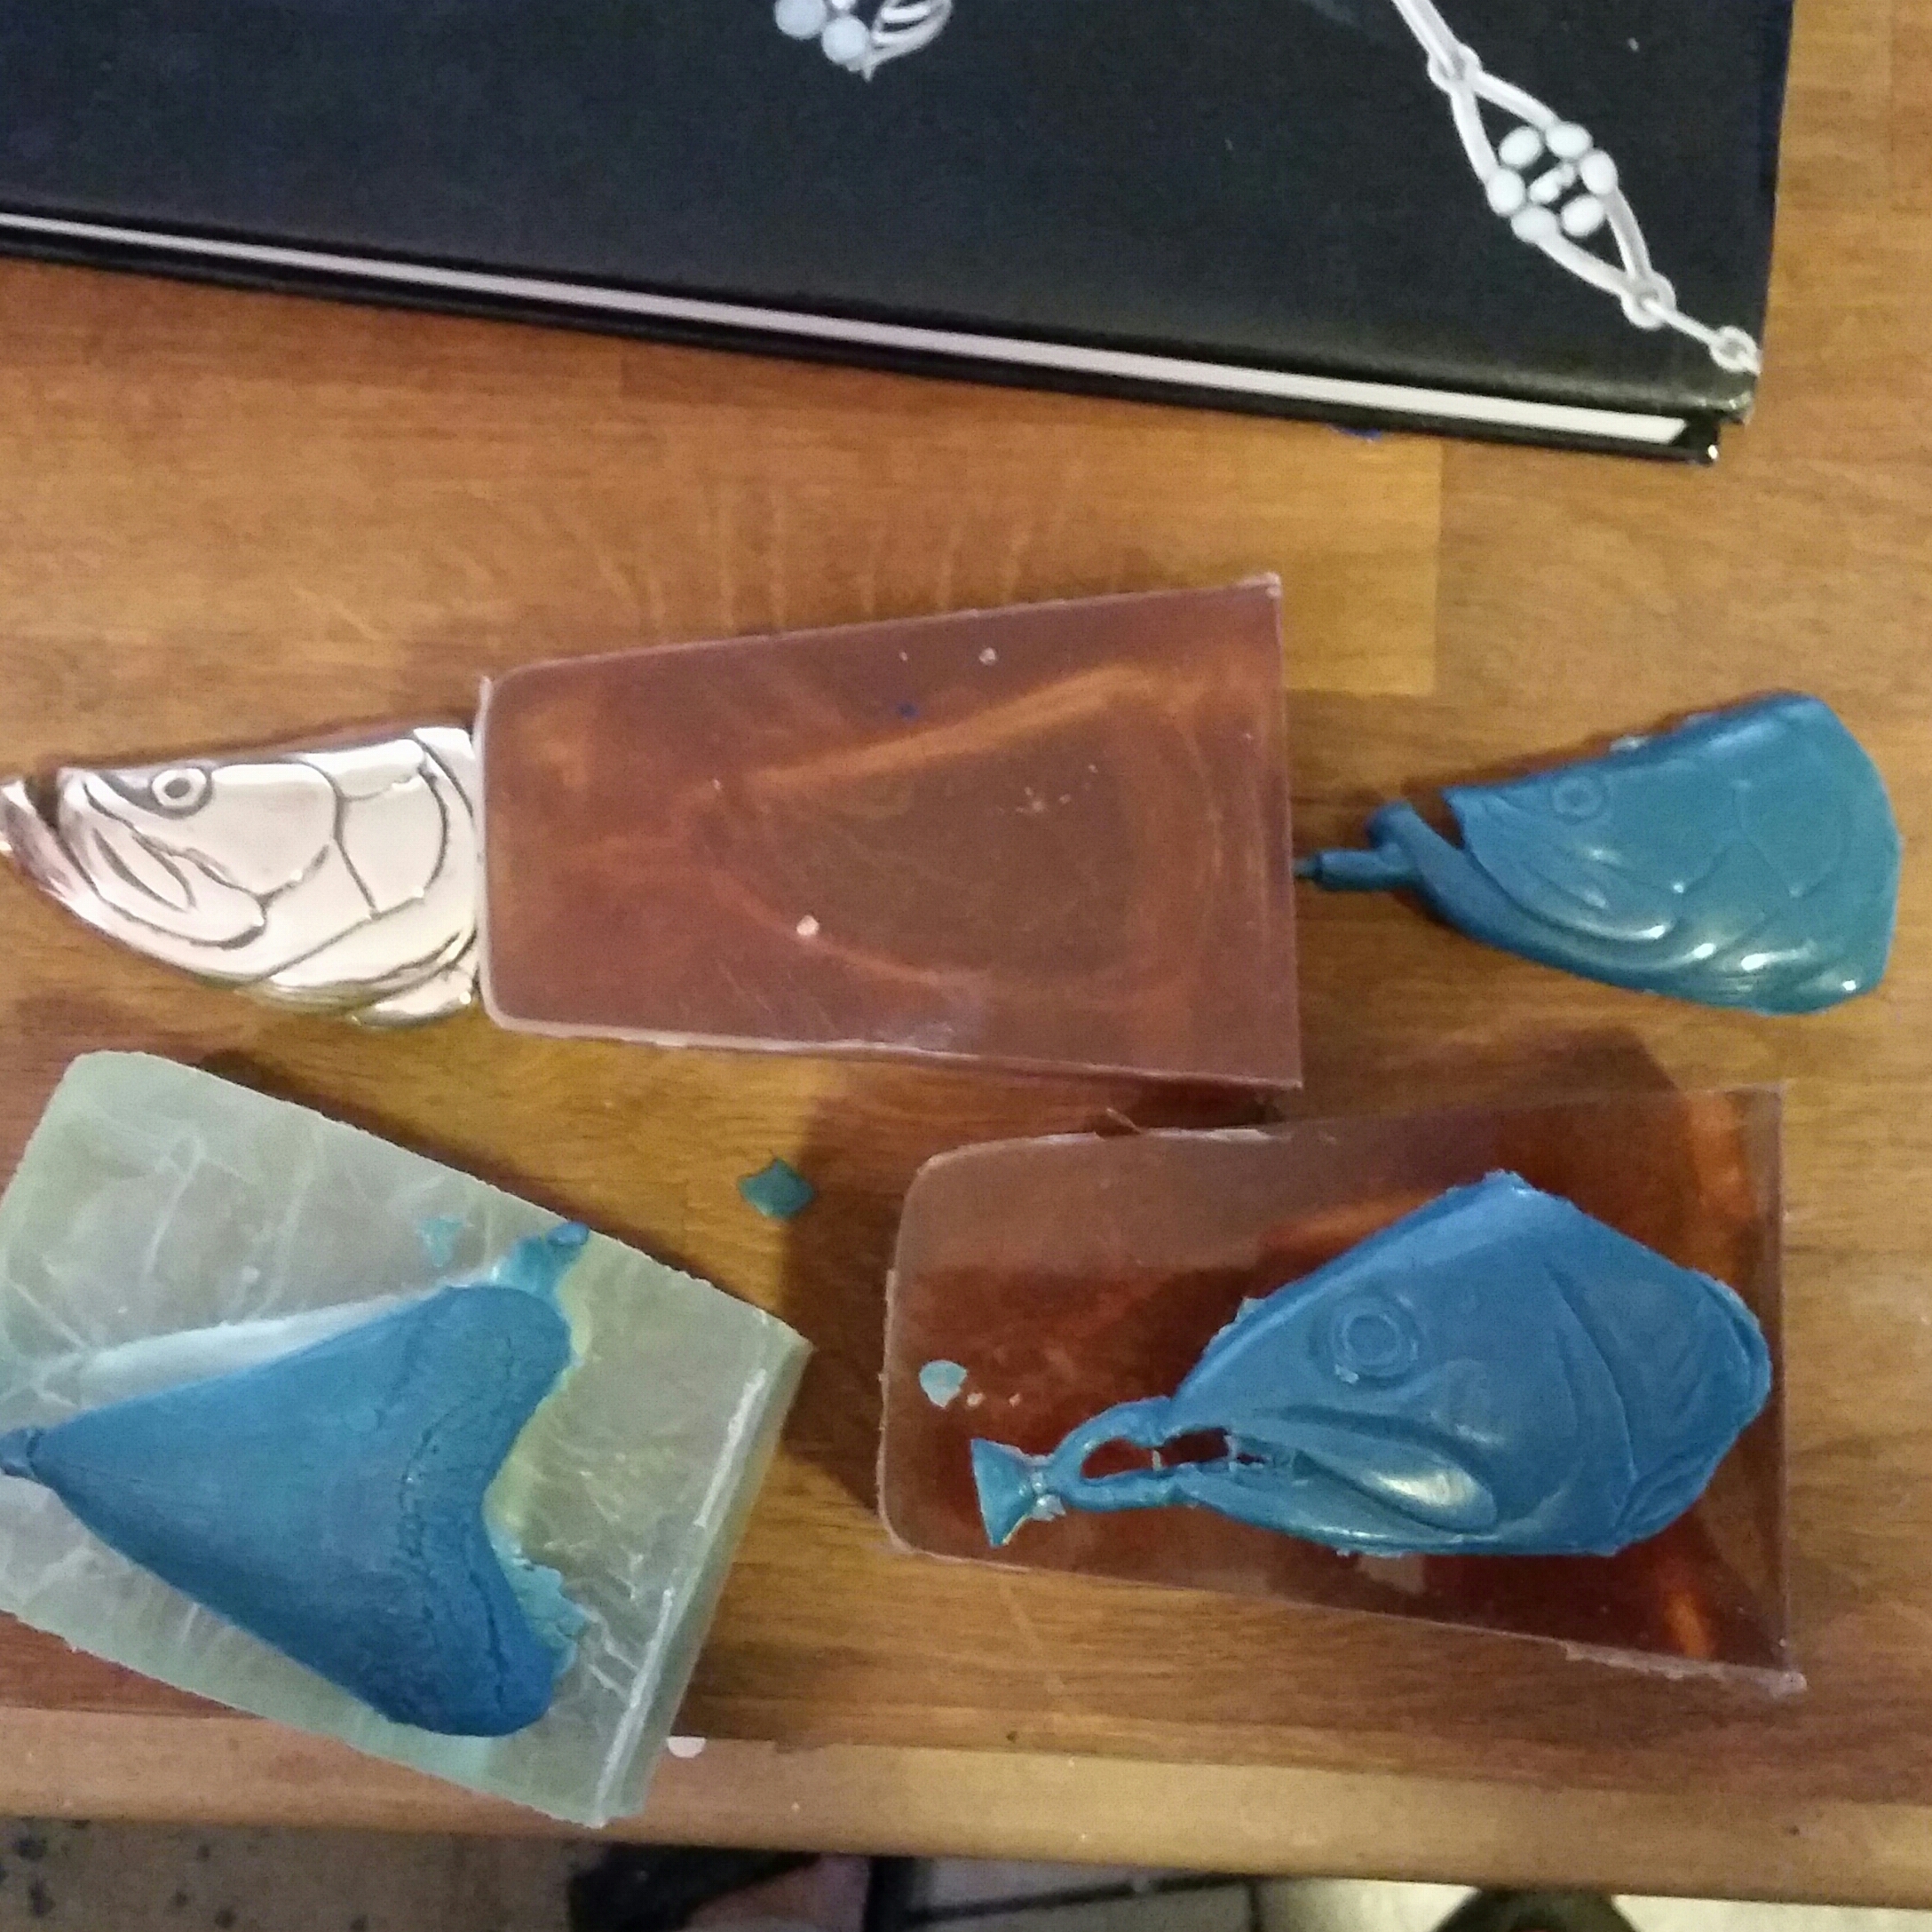
Here the molds have been cut open along the sides of the models to make a 2 part mold. The top of the pictures shows the original bronze casting that I used to make the mold, the mold after cutting with the original removed, and the wax that was shot into the mold to make the reproduction. As you can see from the waxes, there is still a lot of work to be done before the casting process can begin. The next step is to in case these waxes in a cylinder filled with a special high temperature plaster then the plaster is placed in the oven and heated to 1600 Degrees to burn out the wax. Then the molten metal is forced into that cavity by centrifugal force of the casting machine.

Friday, March 25, 2016

Building a setting

This project started out with a customer bringing me a Marquise shaped Stone. and a sketch.The stone was a shape and size then I couldn't buy a setting for so I decided to make one

I used a soft fire brick as my soldering pad and this allowed me to push the wire prongs into the pad and hold them in place in little notches I filed to hold them

After those were soldered I pulled it out of the brick and soldered on the bottom frame.  Unfortunately I don't have a picture of that, but you can see it in the next picture sitting on the solder pad. At this point I still have the prongs sticking down so I pressed them back into the fire brick to allighn it for the next solder joint.


I forged out the wings and added them to the setting.

At this point I pre finished the entire piece before setting the stone so I could get to the hard to reach places and not worry about the stone.


 The finished piece.  This was a custom made piece so it's not available for purchase.


Wednesday, July 15, 2015

Approaching storm cup Process

This was a custom cup done as a gift from my customer to a friend as a wedding cup.  Unfortunately I couldn't get the video to work.
I start out by using card stock to figure out the size and shape of the cup to get a template


Once it is transferred to the  silver I cut the rough shape out and start to texture it with hammers.


 After hammering, the metal becomes work hardened and must be annealed to soften it up for forming and more texturing


 I used 2 or 3 different hammers to get the texture I wanted

 It took several annealings to get all the texturing done.  The idea was go from intense texture on one end to subtle or no texture on the other and fade and grade as the cup turns.
 Unfortunately I didn't get any pictures of soldering the cup into a cone and applying the bottom

The finished cup holds about 2 oz.  good for use as a shot cup or a sake cup. 


Sunday, August 17, 2014

The Teaball Project

This is a metal smithing project I did on my art blog.  It's both art and metal so I think it should be on both blogs   I made a teaball out of sterling because the standard store bought ones are not big enough for a pot of tea. This is not on my website  But pictures are on my Facebook page.


Thursday, July 24, 2014

Braided rings

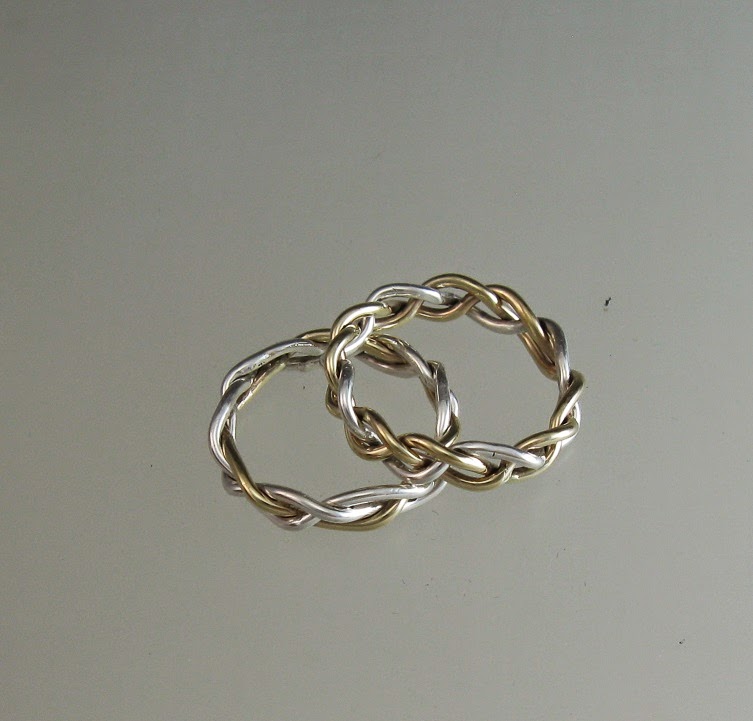
I've  been working on a set of braided gold and silver bands. These are open braids with one 2gold and 1 silver. The other is 2  silver and one gold
The braiding starts with 16 gage wire annealed to dead soft. I'm doing 2 different patterns so I need 2 coils 


The braid looks irregular and uneven at this stage but it can be straightened after soldering  the ends together by forcing it onto a mandrel

the finished rings silver and gold braid


Wednesday, June 4, 2014

This is one of the peices I've been working on that includes stones that I bought from a fellow artist at a "swap meet / flea market" for artists and art supplies. It was a fun day and I came away with a bunch of stones, some of which I don't even know what they are.  However I do know what this one is.  It's Charoite.  It comes from one place in Russia.
"It is a fairly recent discovery found in Russia in 1978 in the Murun mountains in Yakutia, near the Charo River. This is the only known location for this rare mineral. It ranges in color from a light lilac to a deep purple and can be mottled with gray, white and black inclusions. The chatoyant variety in a bright deep purple, is usually considered more valuable than the non-chatoyant variety although both are used in jewelry and compliment a number of other stones." from bernardine
 This is the domed side of a
 a 2 sided pendant
This big pendant is back set meaning the bezel was folded over the stone from the back and the "seat" that the flat side of the stone would sit on is now on the front   This makes this piece wearable either way