Showing posts with label casting. Show all posts

Wednesday, May 6, 2020

Buckle Alchemy

This project started when a collector called me to see if I could make a buckle for 1 1/2 belts from a spear head he found about 20 years ago. It all depended on how wide the spear point was of course so I had him send it to me. That size is pretty rare in a perfect condition spear point so I was pretty amazed when this beauty shower up.  
As luck would have it, this one was just barely wide enough for 1 1/2 belts.
I made an open face box mold with silicon and then made a wax impression from it


The wax is then changed into silver using the ancient process of lost wax casting. The wax model is surrounded with a special high temp plaster and the wax is burned out.  The hollow left in the plaster is then filled with the molten silver using centrifugal force or vacuum assist. Shown here is the rough casting after an acid bath to remove oxides from the surface leaving a layer of frosty white pure silver. 

Pictured here is the original stone point on the left and a bronze patinated casting. The bronze version looks a little smaller but that is mostly a camera thing. There is some shrinkage in the wax model as it cools and in the metal as it cools but it's not really noticeable  it still fit the 1 1/2 belts
This is a silver copy with the stone original. This project was for a custom limited edition buckle, It's not available on my site.
I have also made a buckle from a spear head found by my brother in New England. It fits 1 1/4 in belts.  You can see that here. I make it in silver and bronze.
If you have an object like a sharks tooth or arrow head or even a sea shell that you think would make a unique belt buckle, get in touch with me and we will see if I can perform some magic and turn it into silver.
 contact me at www.jewelryartstudio.com/studio


Wednesday, September 28, 2016

Buckle Castings in Precess


 I'm running through a series of buckles. You can see the progress from rough castings to ready to patina and the finished buckles ready for this weekend show, my website or my etsy store.  This first photo is mostly rough castings with some sanding already started
this second picture is casting mostly finished and ready for patina
Here is some of them finished and waxed and ready to go  
I took this Blue crab claw buckle to the next level by giving it Multiple layers of different patinas. Blues, greens, browns and some black. The final step is wax. The Wax actually saturates the colors and give it depth.
The blue crab claw buckle before patina started
:
I'm tempted to keep this one for myself. But I'll take it to the show this weekend to give other people a chance and put it on the etsy store and website next Monday if it doesn't sell. If you see it and want to claim it before the show on Saturday just contact me and I'll send it to you. It's 95.00

Thursday, May 5, 2016

Making Molds

One of the processes involved with making castings, if you want to make more than one, is making molds. I use a liquid room temperature Vulcanizing urethane or silicone. I use a semi clear formula that allows me to see the part as I cut it out of the mold. Otherwise I'm cutting blindly into block of rubber.
image

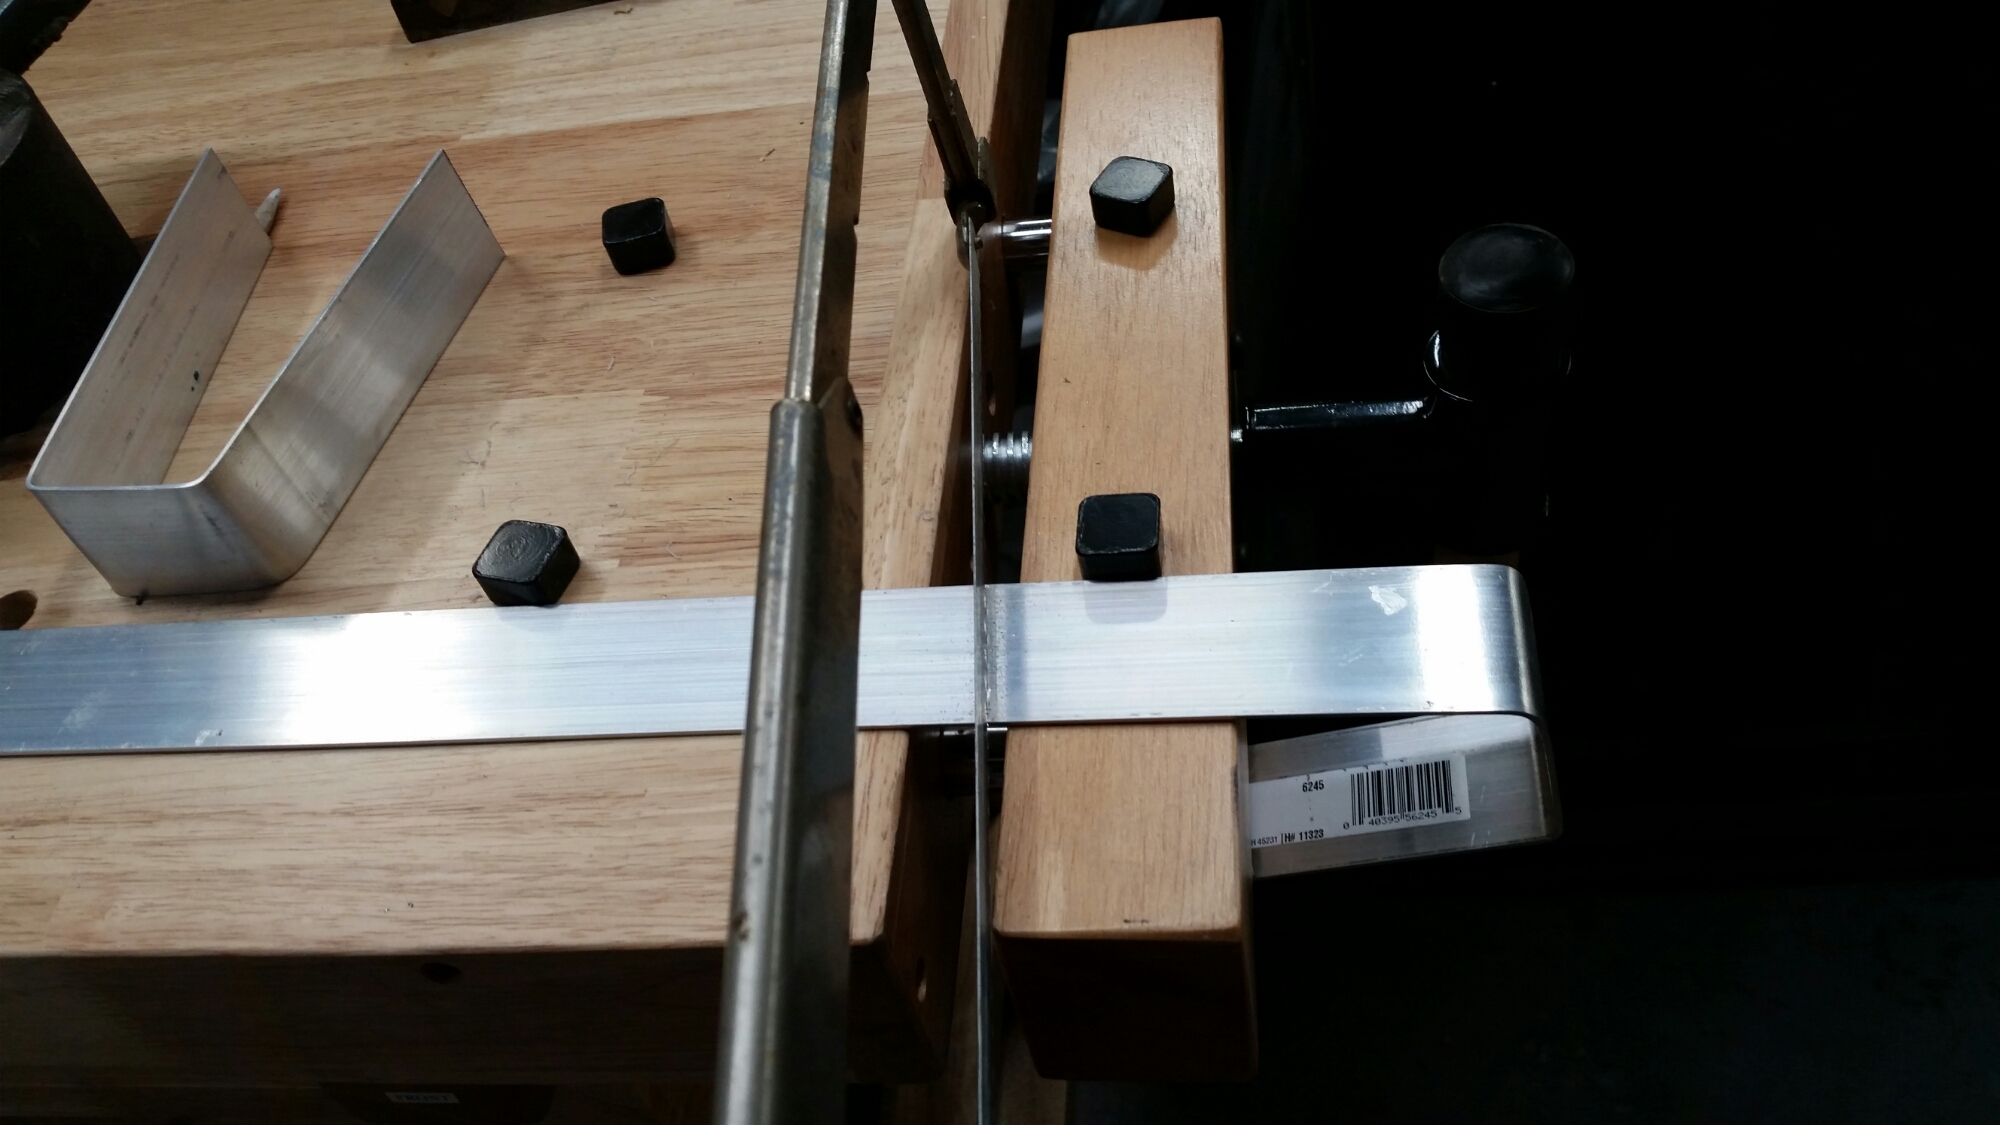
The first step is making the mold frame here I'm cutting a strip of aluminum and bending it into this U shape. I'll make a box out of this with two pieces of plexiglass, put my wax or metal model inside, fixed to the bottom and then pour the rubber around it.
image
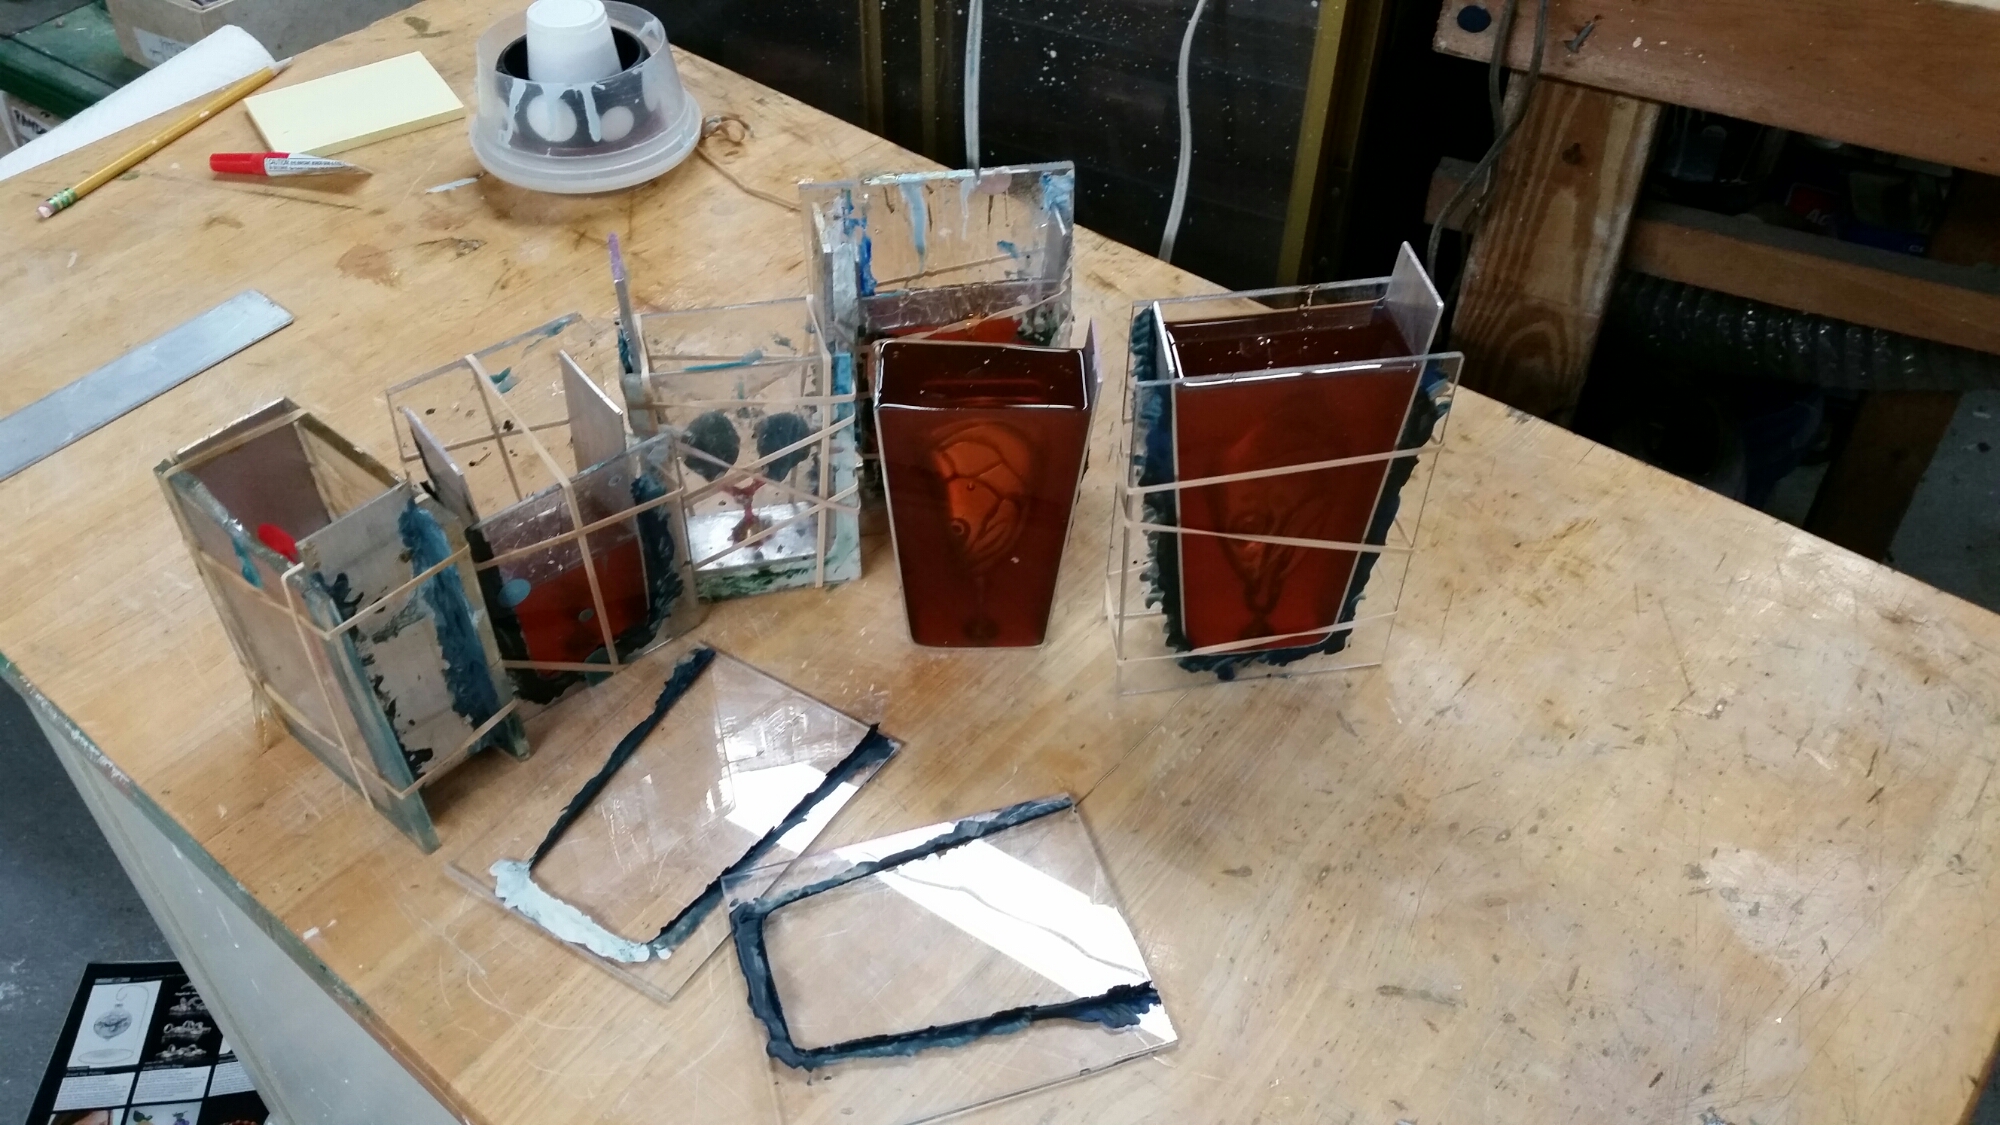
In the picture above, from left to right, you see the box sealed up and ready to pour next is one that is already been poured, in the middle is another one that is ready to pour, second from the right is a cured mold with the box removed and on the end, on the right, is one that's been poured and ready to de-mold
image
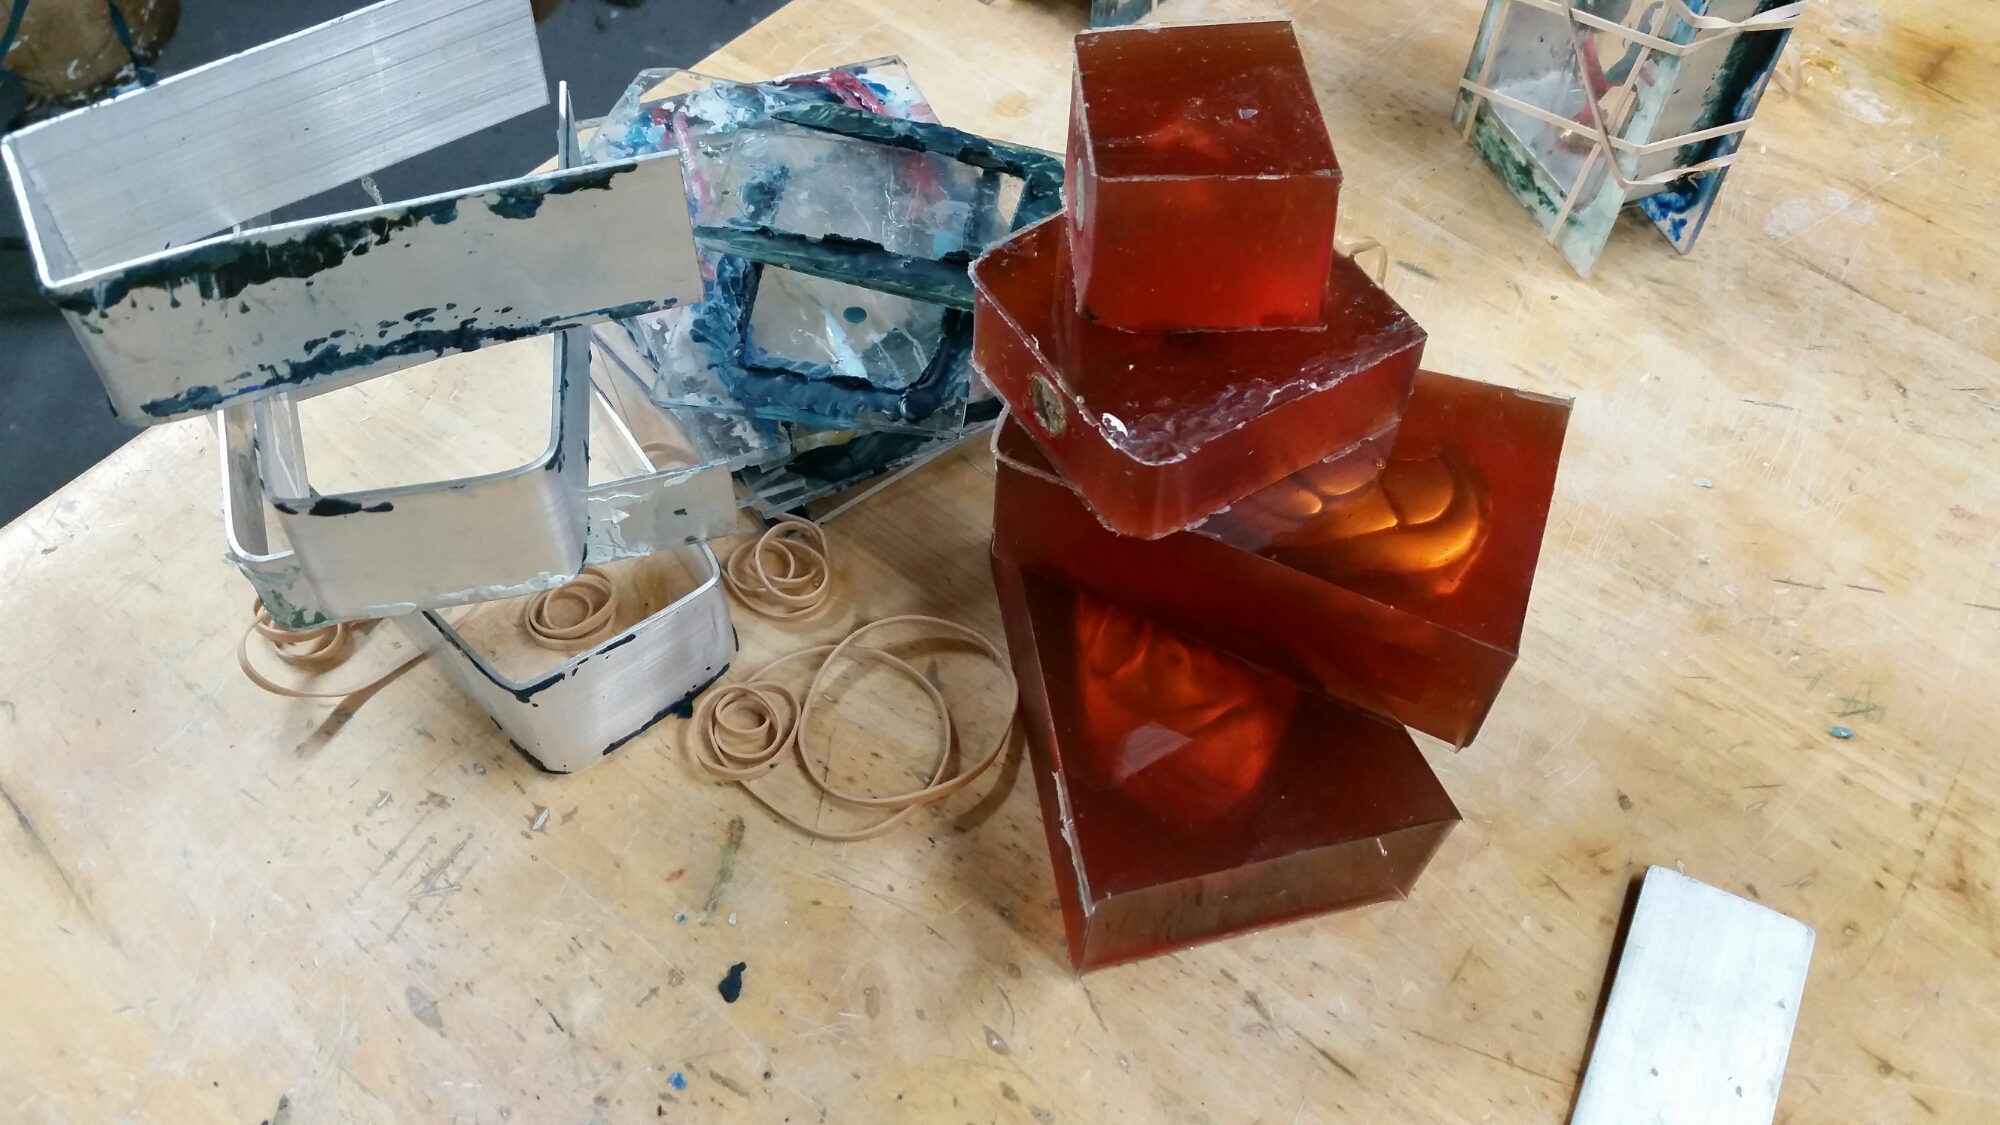
above  is a stack of molds ready to start cutting.
20160324_134700-1-1
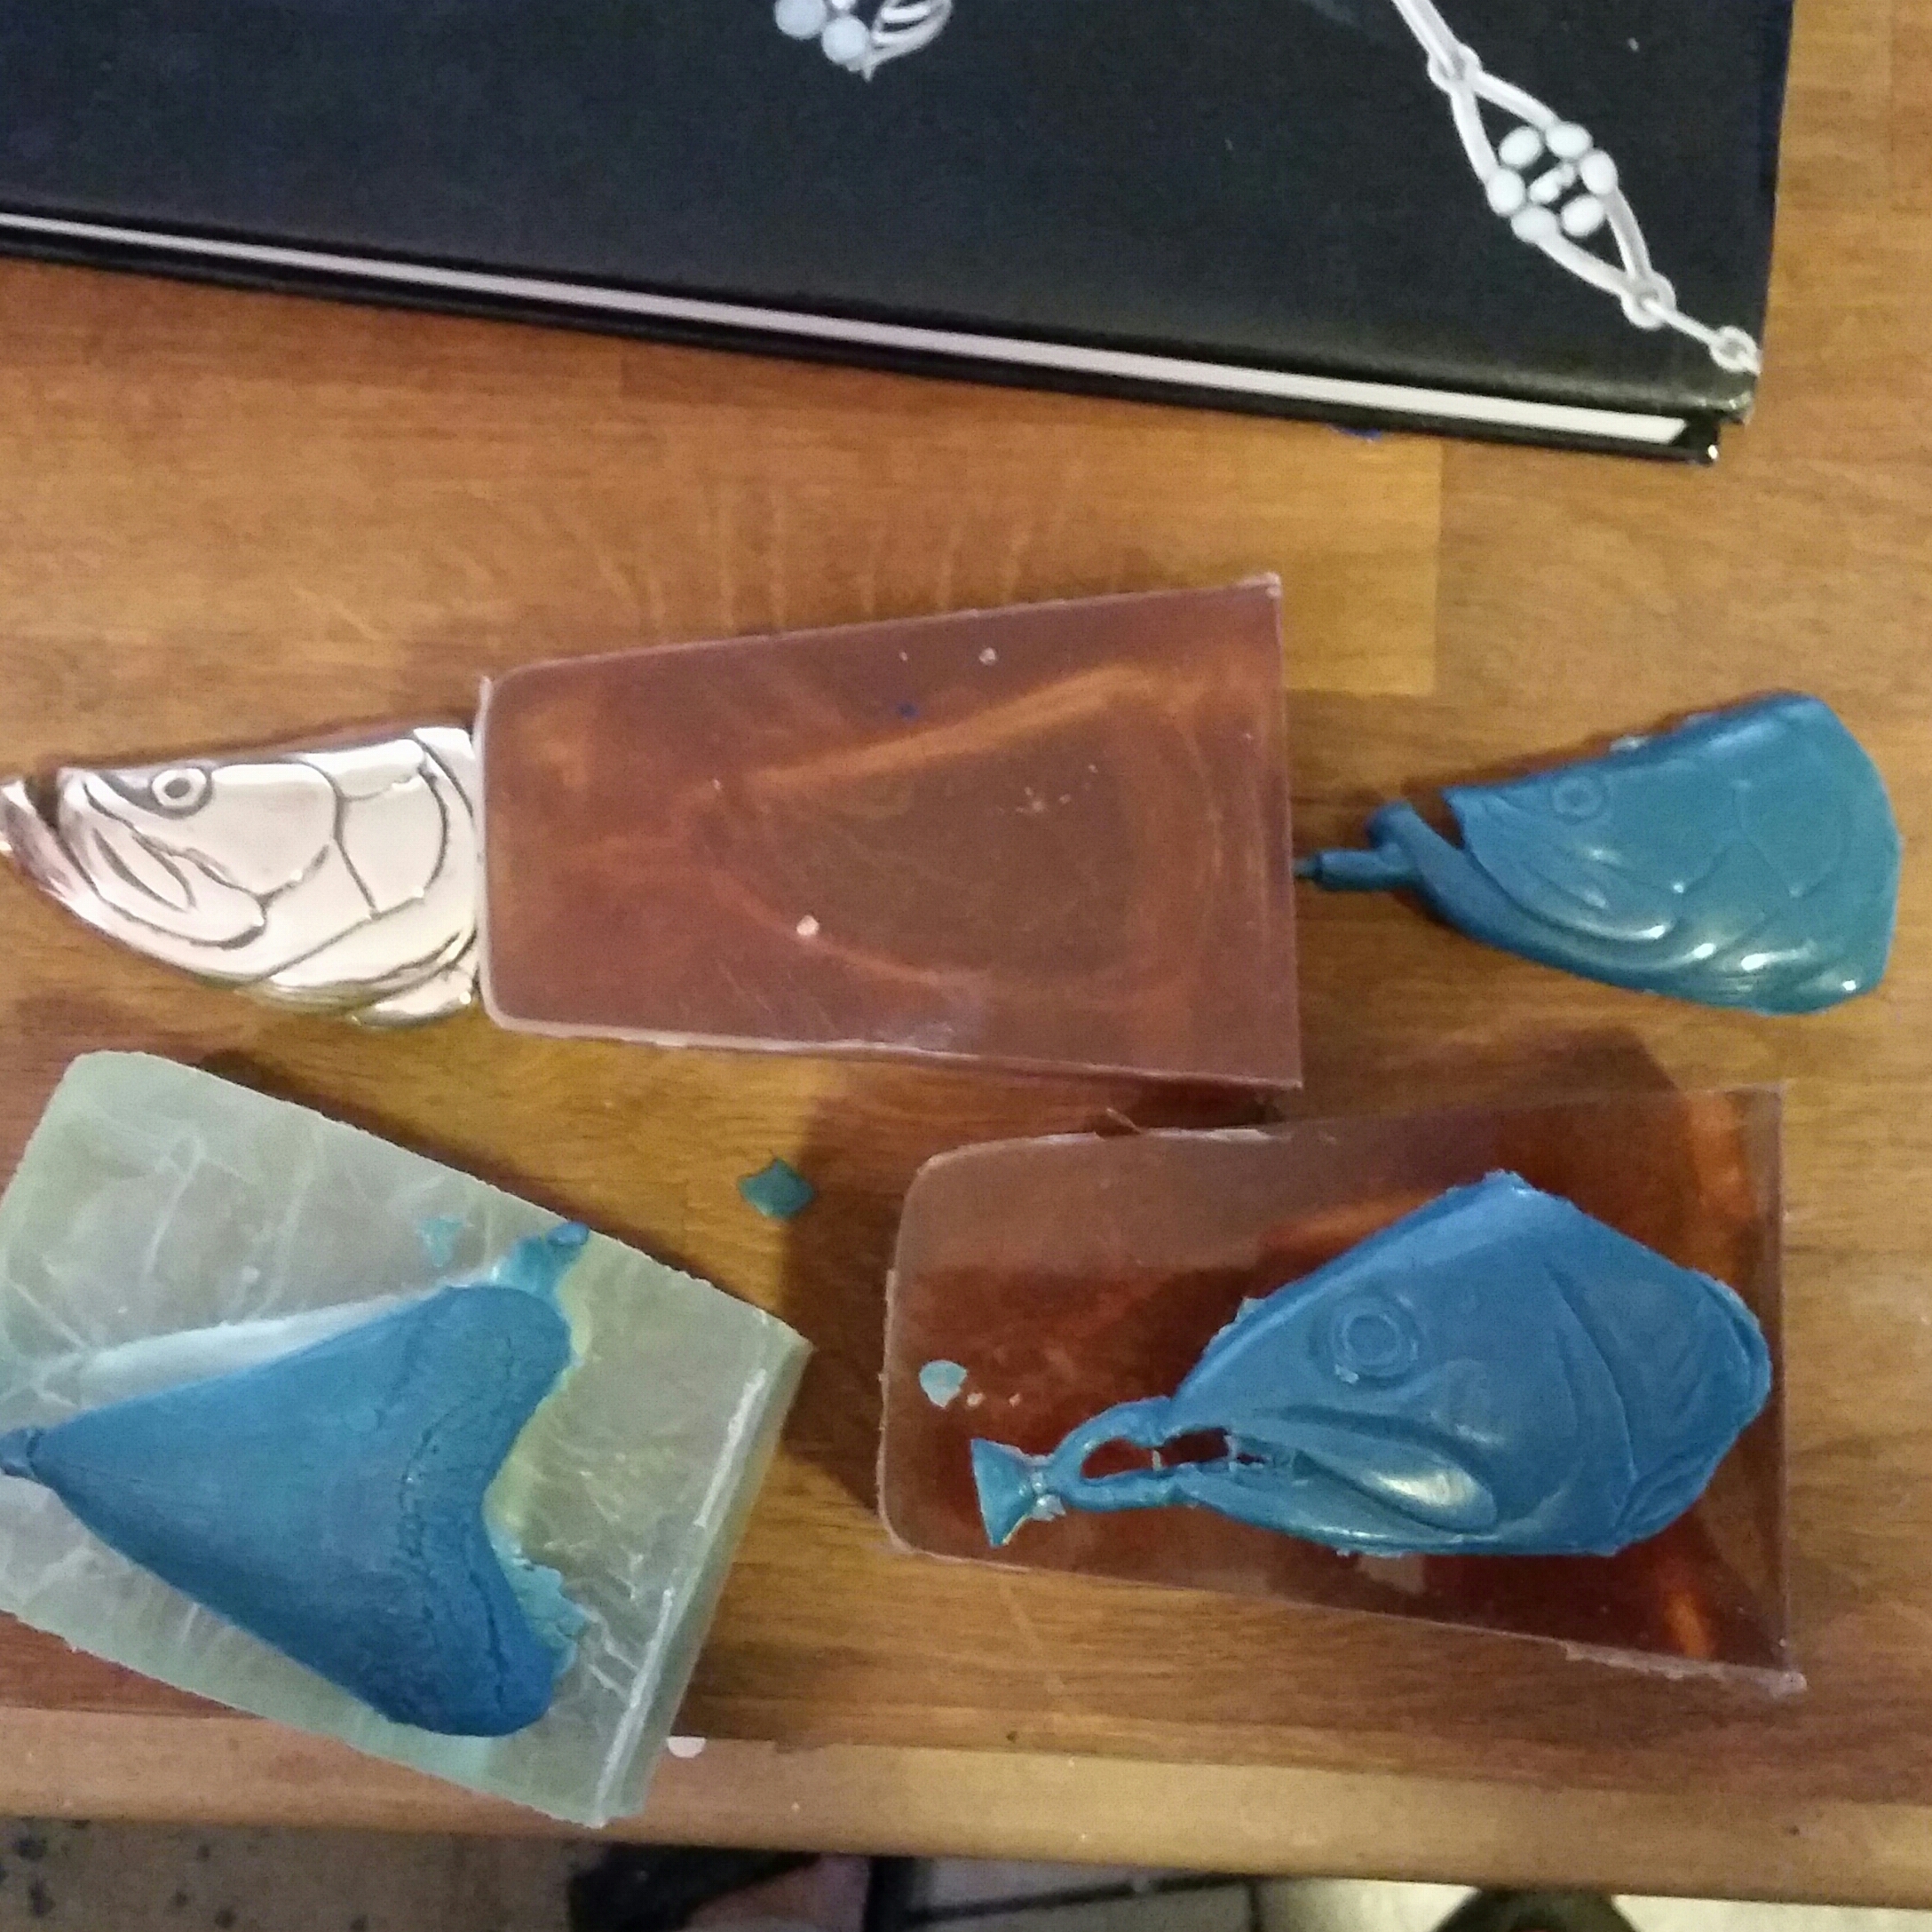
Here the molds have been cut open along the sides of the models to make a 2 part mold. The top of the pictures shows the original bronze casting that I used to make the mold, the mold after cutting with the original removed, and the wax that was shot into the mold to make the reproduction. As you can see from the waxes, there is still a lot of work to be done before the casting process can begin. The next step is to in case these waxes in a cylinder filled with a special high temperature plaster then the plaster is placed in the oven and heated to 1600 Degrees to burn out the wax. Then the molten metal is forced into that cavity by centrifugal force of the casting machine.

Friday, November 4, 2011

Tarpon Bronze Buckles

This new buckle has what I call a flake patina. It essentially colors the bronze the way it will look after wearing so you don't have to go through the "finger print "stage.


New Gator Buckles

This series of 4 smooth textured gator buckles came out great! I'm really happy with the patinas on these. I especially like the green on # 518-50. All my buckle are signed and numbered. If you order one by number, that is the buckle you will recieve.

The color of 518-50 on my screen shows it pretty close to the actual colors, maybe a little more brown and less green in direct sunlight. It is really difficult to photograph these patinas. There is a certain depth to the color that is hard to capture. Even looking at them in different light gives them different color
.
This is # 520-52  I used a more basic brown coloring on this one but as it ages the darks and lights will become more pronounced and the color texturing,mottling will get more contrast. It will get a little darker over time
#517-49 has a light brown antiqued undertone with some light green on top. It looks a little greener than it is in this picture.  It's more subtle on the actual buckle
#519-51 has what I call the basic brown bronze finish.  This is a pre- aged look of dark and light brown
They are all still 75.00, even though the ones with the one of a kind patinas take alot longer to do.
Posted by Picasa

Wednesday, June 29, 2011

Swamp


The biggest batch of gators so far. Textured and smooth. I couldn't resist so I put some patina on a couple just to see what they would look like. The one in the center is the only one that is finshed. The others are all rough castings ready for finishing. There a few red fish in there too.
Posted by Picasa

Thursday, June 2, 2011

New Grouper

This is a new grouper buckle with a very different patina. I did several layers of brown and green using heat to get a darker color in some places. I was going for a more patterned surface because the grouper has a very distinct random looking pattern of darks and lights. This one off is available for 65.00 on the one of a kind page of my website.
Posted by Picasa

Monday, July 20, 2009

From the bench


Here's one for the techies that like to see the process. This is a shot of my bench after 2 or 3 casting sessions. These are all silver except for the gold hearts in the upper left corner. They are still attached to the sprus and casting button. All the others have been cut off but nothing else has been done. This is what sterling silver looks like after casting. Now the fun begins. Figuring out what to do with it all I have a few ideas. But first it's grinding, sanding soldering on parts buffing and tumbling for a high polish finish. Antiquing (oxidizing) for contrast. Most of these pieces will be used in combination with other castings, stones or beads for color. The little gold hearts will be soldered onto the cross. These are part of my hearts line and part of a wholesale order. The trees will get finished and put on chains. There are a couple of leaves in there that will get the same treatment. Just a nice simple statement about nature and the beauty of curved line. Everything else is up for further design. The branches are molded from actual sticks that were drift wood found on the beaches of the north fork of Long Island. The texture will pop out with finishing. The leaves are all one of a kind as is the rose. Not sure what I'm going to do with the rose. Any ideas? Stay tuned to see what comes out. It looks like a mess now but some beautiful jewelry will emerge after I wave my magic wand over it.

Wednesday, May 20, 2009

Gold Rings


The 3 gold rings cast in white gold, yellow gold and rose gold

casting steps


First step is tomake the wax modles. Here I have the silver bezel cups already made so I can place them and build the wax ring around the stone


This is the rough casting still attached to the spru and button. The spru is the feeder gate for the liquid metal to flow to the design. The button is extra metal to allow for shrinkage as the hot metal cools and contracts. You can see 2 gold casting here also one in yellow and one in rose.

The fishished rings

Tuesday, May 19, 2009

New Ideas


These 3 new pieces are demos for a new class on what to do with your scrap. It's a combination of melting and fabriating using found metal and scrapes


Friday, May 15, 2009

Cast Gold Ring


Another custom wedding ring. This is a man's ring carved in wax and cast in 14k white. the edges on this one are very rounded for extreme comfort and easy removal.