Showing posts with label process. Show all posts

Thursday, April 9, 2020

A 3 year (so far) Custom Project

This Project started about 3 years ago when a customer wanted a special chain made to celebrate her 88th birthday. We came up with a design that incorporated the 88 into a Mobius infinity band.  I made a heavy silver link chain to go with it. The next year we went to a smaller link about the size of the ones I made for the chain. The 89 posed some design problems but we came up with something slightly abstract with the 9 sort of flipped to balance the  shape within the frame of the link. This year we returned to the link size to make the link for 90 but the customer wanted some gold. She had the idea that the number should be the gold in the shape of the Roman Numeral for 90. I also made an extra link for everyday wear. www.jewelryartstudio.com


I also made an extra link for everyday wear

Friday, June 2, 2017

Exploring the Explorer

I wanted an all around buckle that could be worn anytime, anywhere, from the exchange floor to your best friend's wedding, to exploring the south sea islands. I recently discovered Indiana Jones has a similar buckle holding his gun belt. Thus the name Explorer seemed fitting. I first came up with the idea of making conventional style buckles for my line about 3 years ago. I have made them in the past but have not added any to the line. I was caught up in making fish buckles and other non-fish themed buckles (e.g., the Arrowhead, the Spearhead) using prong stye attachments.

The original design was intended for 1.25 inch belts, however 1.5 inch belts have increased in popularity so I decided to scale up the buckle. If I just made it wider, the proportions would be off so I had to re-carve the design to accommodate 1.5 inch belts. Below are some pictures of the process and the final outcome.

This is the 2 wax originals ready to put in plaster for casting.


This shot shows the rough castings just out of the plaster.

 Here are the castings cleaned up a bit in the acid.


 The filing begins.
In order to do the hammered texture, the surface must first be smooth and polished.

 Ready for hammering.


 Top view of the finished piece.


View the final Explorer buckle in Sterling Silver on 1.5 inch brown cow-hide belt. 


Thursday, May 5, 2016

Making Molds

One of the processes involved with making castings, if you want to make more than one, is making molds. I use a liquid room temperature Vulcanizing urethane or silicone. I use a semi clear formula that allows me to see the part as I cut it out of the mold. Otherwise I'm cutting blindly into block of rubber.
image

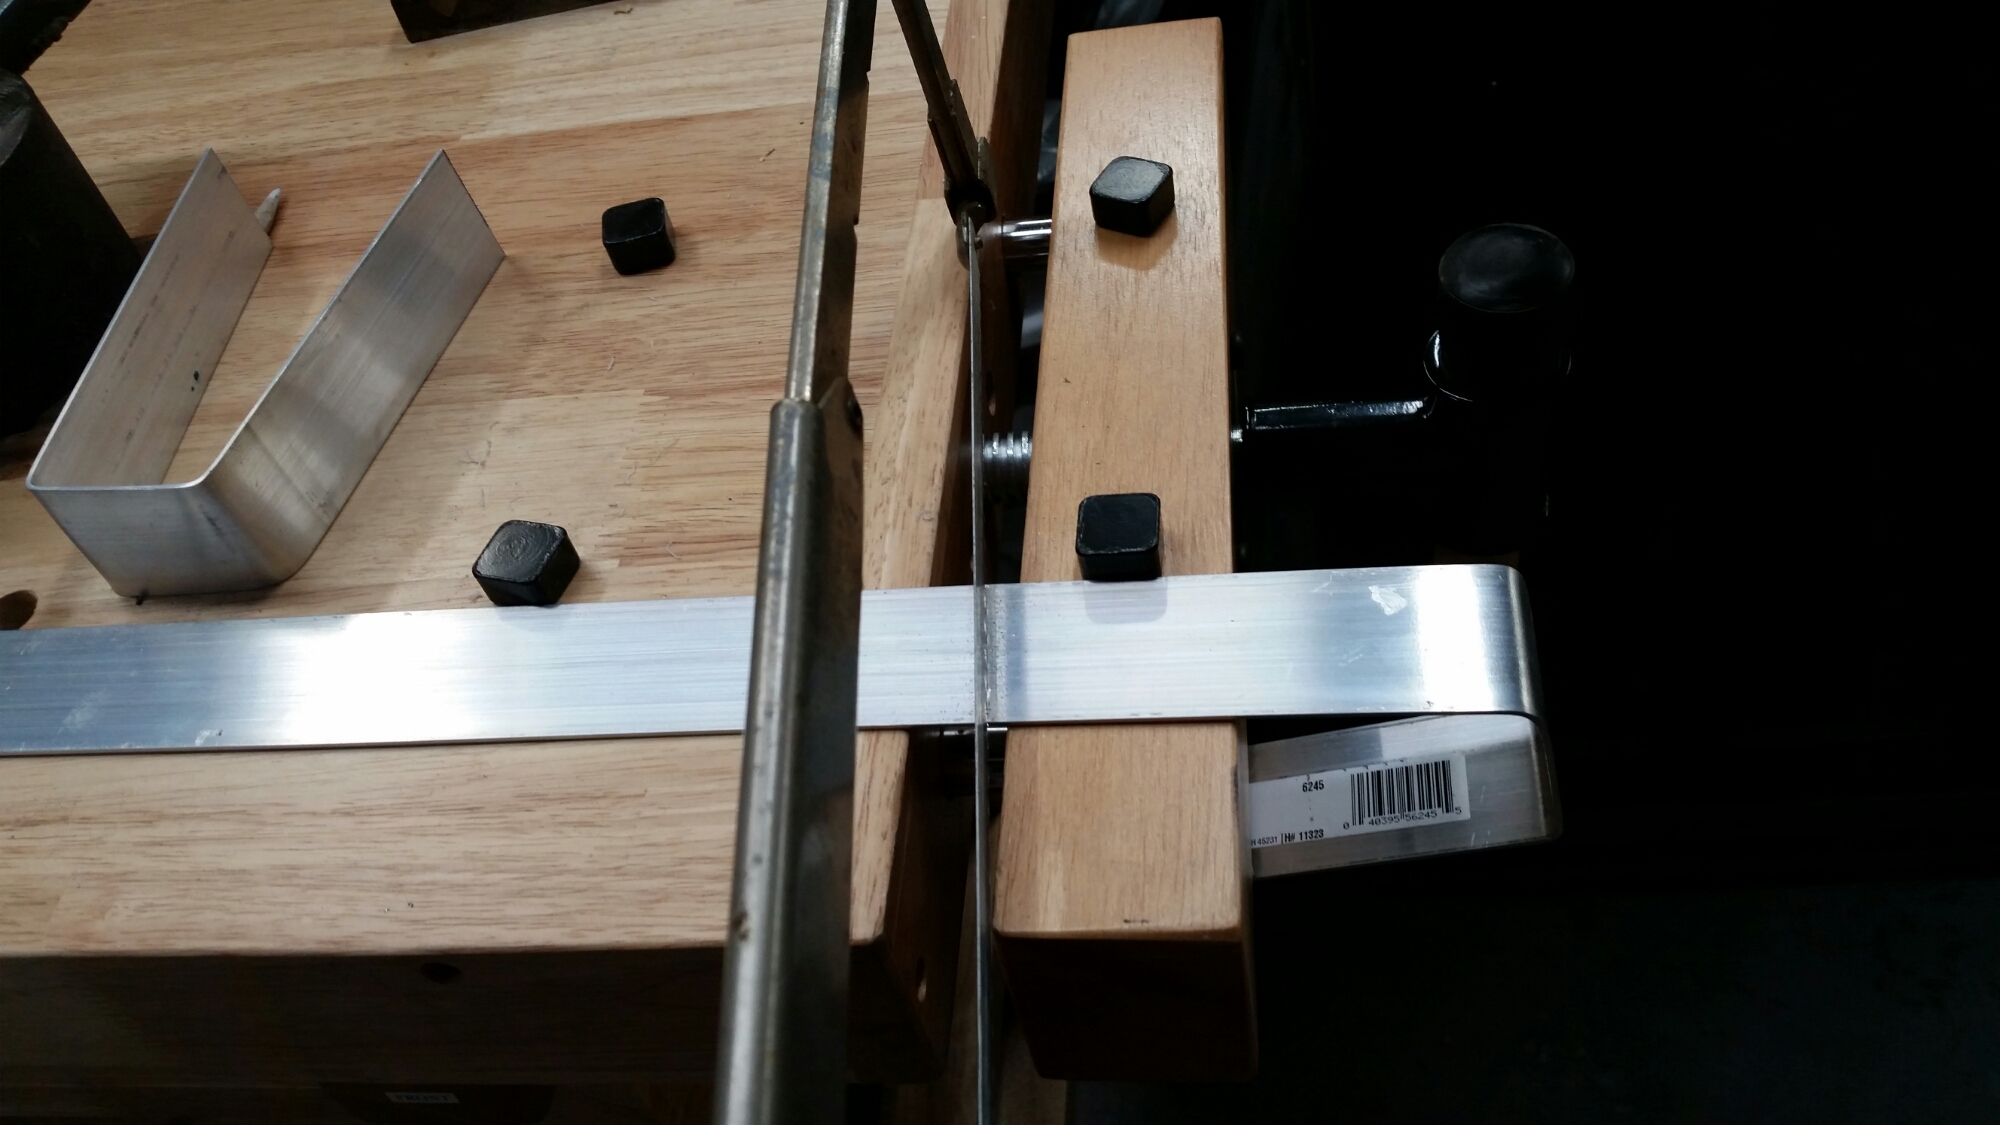
The first step is making the mold frame here I'm cutting a strip of aluminum and bending it into this U shape. I'll make a box out of this with two pieces of plexiglass, put my wax or metal model inside, fixed to the bottom and then pour the rubber around it.
image
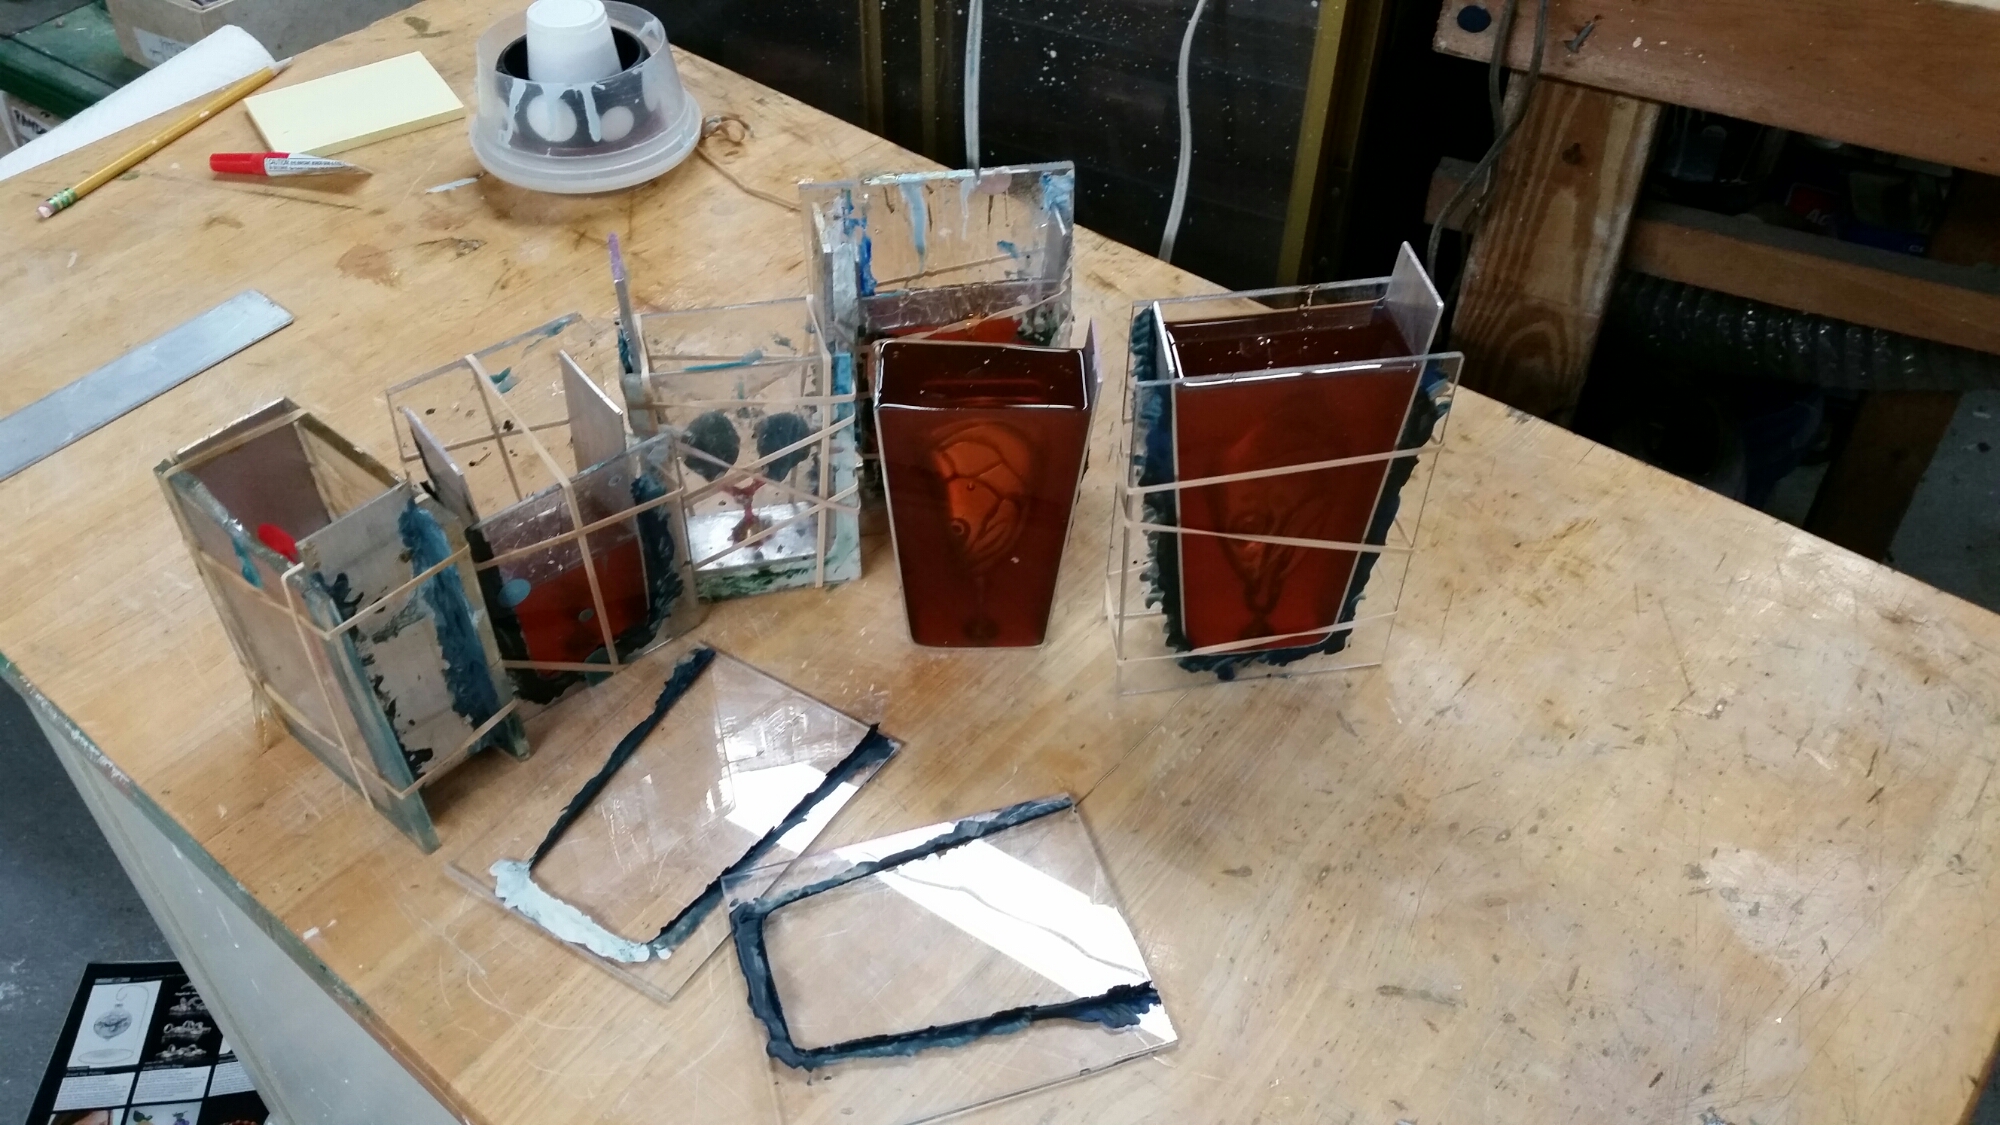
In the picture above, from left to right, you see the box sealed up and ready to pour next is one that is already been poured, in the middle is another one that is ready to pour, second from the right is a cured mold with the box removed and on the end, on the right, is one that's been poured and ready to de-mold
image
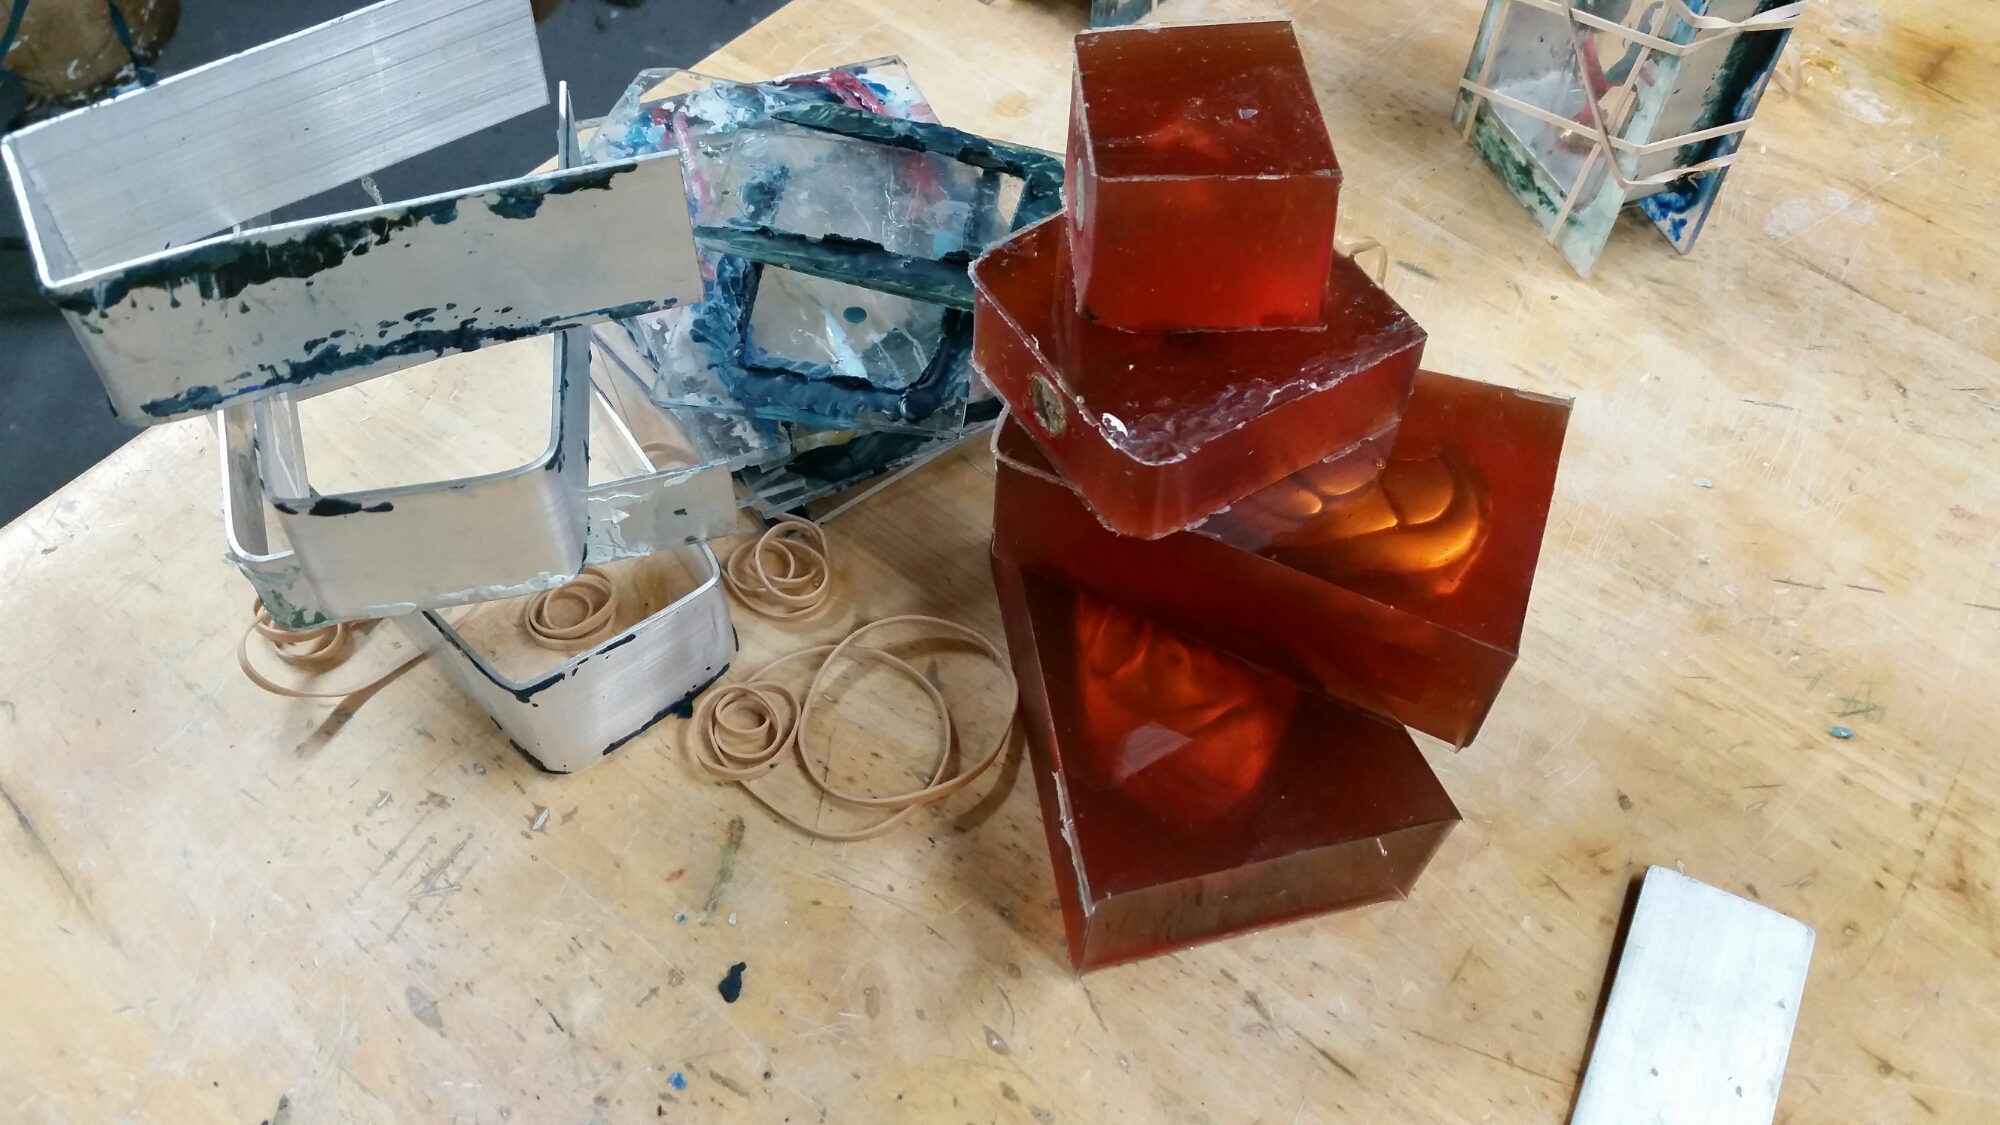
above  is a stack of molds ready to start cutting.
20160324_134700-1-1
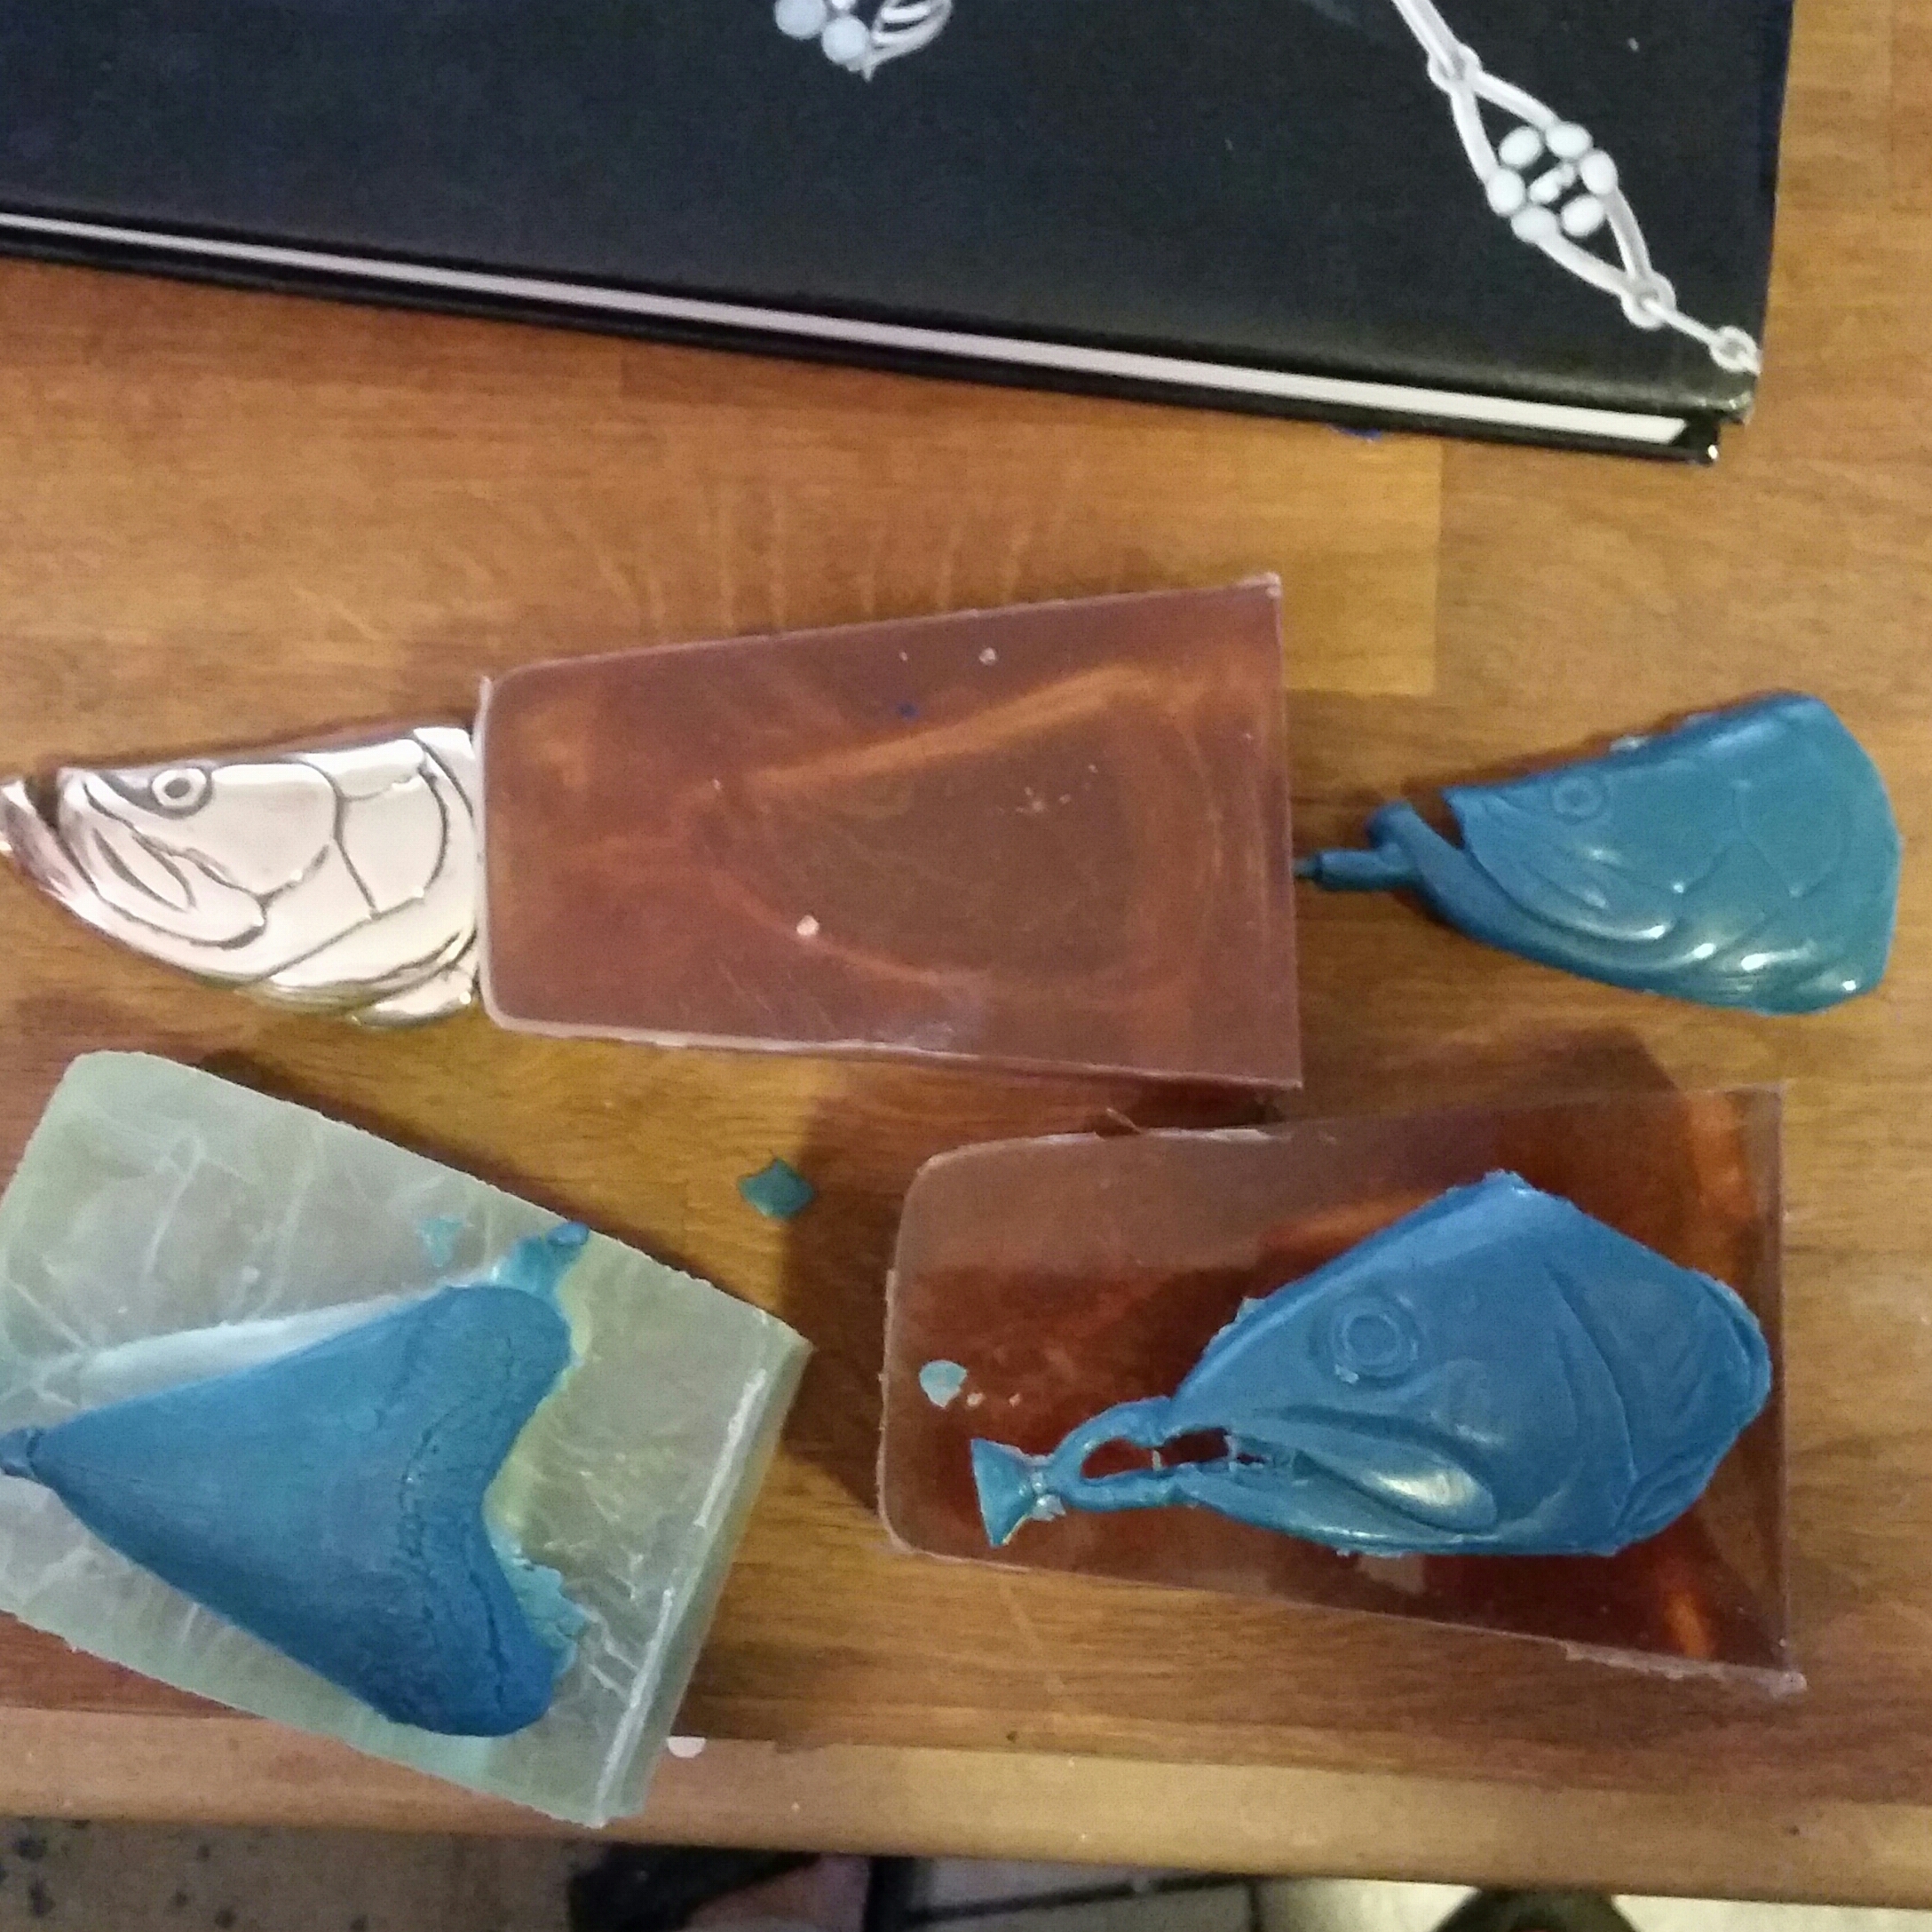
Here the molds have been cut open along the sides of the models to make a 2 part mold. The top of the pictures shows the original bronze casting that I used to make the mold, the mold after cutting with the original removed, and the wax that was shot into the mold to make the reproduction. As you can see from the waxes, there is still a lot of work to be done before the casting process can begin. The next step is to in case these waxes in a cylinder filled with a special high temperature plaster then the plaster is placed in the oven and heated to 1600 Degrees to burn out the wax. Then the molten metal is forced into that cavity by centrifugal force of the casting machine.

Friday, March 25, 2016

Building a setting

This project started out with a customer bringing me a Marquise shaped Stone. and a sketch.The stone was a shape and size then I couldn't buy a setting for so I decided to make one

I used a soft fire brick as my soldering pad and this allowed me to push the wire prongs into the pad and hold them in place in little notches I filed to hold them

After those were soldered I pulled it out of the brick and soldered on the bottom frame.  Unfortunately I don't have a picture of that, but you can see it in the next picture sitting on the solder pad. At this point I still have the prongs sticking down so I pressed them back into the fire brick to allighn it for the next solder joint.


I forged out the wings and added them to the setting.

At this point I pre finished the entire piece before setting the stone so I could get to the hard to reach places and not worry about the stone.


 The finished piece.  This was a custom made piece so it's not available for purchase.


Wednesday, July 15, 2015

Approaching storm cup Process

This was a custom cup done as a gift from my customer to a friend as a wedding cup.  Unfortunately I couldn't get the video to work.
I start out by using card stock to figure out the size and shape of the cup to get a template


Once it is transferred to the  silver I cut the rough shape out and start to texture it with hammers.


 After hammering, the metal becomes work hardened and must be annealed to soften it up for forming and more texturing


 I used 2 or 3 different hammers to get the texture I wanted

 It took several annealings to get all the texturing done.  The idea was go from intense texture on one end to subtle or no texture on the other and fade and grade as the cup turns.
 Unfortunately I didn't get any pictures of soldering the cup into a cone and applying the bottom

The finished cup holds about 2 oz.  good for use as a shot cup or a sake cup. 


Thursday, July 24, 2014

Braided rings

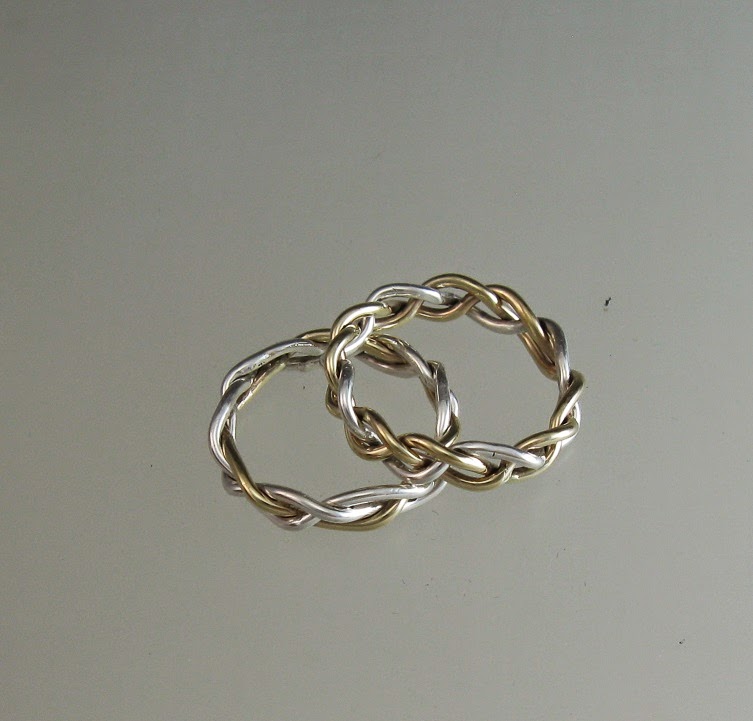
I've  been working on a set of braided gold and silver bands. These are open braids with one 2gold and 1 silver. The other is 2  silver and one gold
The braiding starts with 16 gage wire annealed to dead soft. I'm doing 2 different patterns so I need 2 coils 


The braid looks irregular and uneven at this stage but it can be straightened after soldering  the ends together by forcing it onto a mandrel

the finished rings silver and gold braid


Saturday, February 15, 2014

If I had a hammer

Using my big textured face cross peen hammer, I forged out these tapered sterling rods. 2 are going to be bracelets and the the 3rd (first picture) is going to be part of a pendant.

Some of the other one off pieces being worked on at the same time 

Thursday, June 2, 2011

New Grouper

This is a new grouper buckle with a very different patina. I did several layers of brown and green using heat to get a darker color in some places. I was going for a more patterned surface because the grouper has a very distinct random looking pattern of darks and lights. This one off is available for 65.00 on the one of a kind page of my website.
Posted by Picasa

Tuesday, May 31, 2011

Painting pins

This bad shot is of 3 painting pins. This is about all I have left from this series of pin pendants. The center one is of bronze and the acrylic painting is set behind polycarbonate and set like a stone with silver bezel. The sticks are also silver. The one on the right is a print of a watercolor I did of a swimming pool It's coated with acrylic and set from behind in a copper frame. The left on is also a print and set from behind in a silver frame. The top picture shows some paintings that have yet to be used, waiting patiently to be cropped and prepared for the next series to begin.
Posted by Picasa

Monday, July 20, 2009

From the bench


Here's one for the techies that like to see the process. This is a shot of my bench after 2 or 3 casting sessions. These are all silver except for the gold hearts in the upper left corner. They are still attached to the sprus and casting button. All the others have been cut off but nothing else has been done. This is what sterling silver looks like after casting. Now the fun begins. Figuring out what to do with it all I have a few ideas. But first it's grinding, sanding soldering on parts buffing and tumbling for a high polish finish. Antiquing (oxidizing) for contrast. Most of these pieces will be used in combination with other castings, stones or beads for color. The little gold hearts will be soldered onto the cross. These are part of my hearts line and part of a wholesale order. The trees will get finished and put on chains. There are a couple of leaves in there that will get the same treatment. Just a nice simple statement about nature and the beauty of curved line. Everything else is up for further design. The branches are molded from actual sticks that were drift wood found on the beaches of the north fork of Long Island. The texture will pop out with finishing. The leaves are all one of a kind as is the rose. Not sure what I'm going to do with the rose. Any ideas? Stay tuned to see what comes out. It looks like a mess now but some beautiful jewelry will emerge after I wave my magic wand over it.