Showing posts with label belt buckle. Show all posts

Wednesday, May 6, 2020

Buckle Alchemy

This project started when a collector called me to see if I could make a buckle for 1 1/2 belts from a spear head he found about 20 years ago. It all depended on how wide the spear point was of course so I had him send it to me. That size is pretty rare in a perfect condition spear point so I was pretty amazed when this beauty shower up.  
As luck would have it, this one was just barely wide enough for 1 1/2 belts.
I made an open face box mold with silicon and then made a wax impression from it


The wax is then changed into silver using the ancient process of lost wax casting. The wax model is surrounded with a special high temp plaster and the wax is burned out.  The hollow left in the plaster is then filled with the molten silver using centrifugal force or vacuum assist. Shown here is the rough casting after an acid bath to remove oxides from the surface leaving a layer of frosty white pure silver. 

Pictured here is the original stone point on the left and a bronze patinated casting. The bronze version looks a little smaller but that is mostly a camera thing. There is some shrinkage in the wax model as it cools and in the metal as it cools but it's not really noticeable  it still fit the 1 1/2 belts
This is a silver copy with the stone original. This project was for a custom limited edition buckle, It's not available on my site.
I have also made a buckle from a spear head found by my brother in New England. It fits 1 1/4 in belts.  You can see that here. I make it in silver and bronze.
If you have an object like a sharks tooth or arrow head or even a sea shell that you think would make a unique belt buckle, get in touch with me and we will see if I can perform some magic and turn it into silver.
 contact me at www.jewelryartstudio.com/studio


Monday, September 23, 2019

1800 Buckles

I started making buckles when I started making metal jewelry back in the late 70's.  I think the first one was made from scrape bronze banjo pieces from when I worked at Stewart MacDonald. I made several when I went to Penland in the 80's as "tech samples"  for the lamination techniques I learned with Chuck Evans  I didn't start keeping track of them until I started the series of Fish Face buckles in 1998. That's when I started numbering them. I passed #1800 right at the end of the year (2018) .  At the beginning of 2019 I started posting the buckles with the # of the number as of this writing I'm on #1868. This is the Farrier in sterling for 1 1/2 belts. I have been posting the sold buckles with their numbers  on www.Instagram.com/@jewelryartstudio I'm posting the front and back of each buckle as I finish them.  Most buckles don't get signed and numbered until they are sold.  They are all, so far, part of my inventory of designs so they can be ordered through my websites. If you follow # on instagram you can follow #petersenesacart and see paintings and jewelry in one place.

You can sign up for my occasional news letter (I'll let you ) at www.jewelryartstudio.com and click on the pop up

Monday, August 6, 2018

3 New Buckles Added to the Etsy Store

I recently added 3 new buckles to the ETSY store
 this is the 1 1/2 inch Arrow head buckle in bronze.  This is a wider version of the original 1.25 arrow head buckle carved down from the mold a found spear head.


This is the sterling version of the 1 1/2 inch  Megalodon sharks tooth . I molded it from an actual fossil tooth found in the Tampa Bay area by a customer who dove for it in an area that was about to be built over with a condo. It was on its way to the natural history museum for their collection but he let me borrow it for a few days to make a mold of the front of it. It's a beauty. This one is also for 1.5 inch belts. I do a bronze and white bronze version of this but this is the first sterling one.


This is the white bronze version of the lab buckle for 1.25 belts.  I have done this design in bronze and sterling so this is first successful white bronze casting.  White bronze is harder to cast because of the pitting that occurs on the castings,  It's very difficult to get a perfect casting in white bronze in this design, but this one came pretty close

Thursday, November 16, 2017

The Making of The Silver Farrier Quater Horse


This buckle was designed for 1.25 inch belts. It is now on my Etsy store.  Its based loosly on shape of a horse shoe and the Western style buckles. This is the process for making a Quarter Horse Farrier buckle in silver. I have done this one in bronze but this is the first time I've done it in silver. You can see more about this design here and see the finished bronze version here
After the casting process, which takes many steps, I start sanding down the silver to get all the surface imperfections and oxides off.


 Then I use various hammers to get the final size, shape, and texture. 


 The silver is then oxidized to create the dark areas and the highlights are polished.


Friday, June 2, 2017

Exploring the Explorer

I wanted an all around buckle that could be worn anytime, anywhere, from the exchange floor to your best friend's wedding, to exploring the south sea islands. I recently discovered Indiana Jones has a similar buckle holding his gun belt. Thus the name Explorer seemed fitting. I first came up with the idea of making conventional style buckles for my line about 3 years ago. I have made them in the past but have not added any to the line. I was caught up in making fish buckles and other non-fish themed buckles (e.g., the Arrowhead, the Spearhead) using prong stye attachments.

The original design was intended for 1.25 inch belts, however 1.5 inch belts have increased in popularity so I decided to scale up the buckle. If I just made it wider, the proportions would be off so I had to re-carve the design to accommodate 1.5 inch belts. Below are some pictures of the process and the final outcome.

This is the 2 wax originals ready to put in plaster for casting.


This shot shows the rough castings just out of the plaster.

 Here are the castings cleaned up a bit in the acid.


 The filing begins.
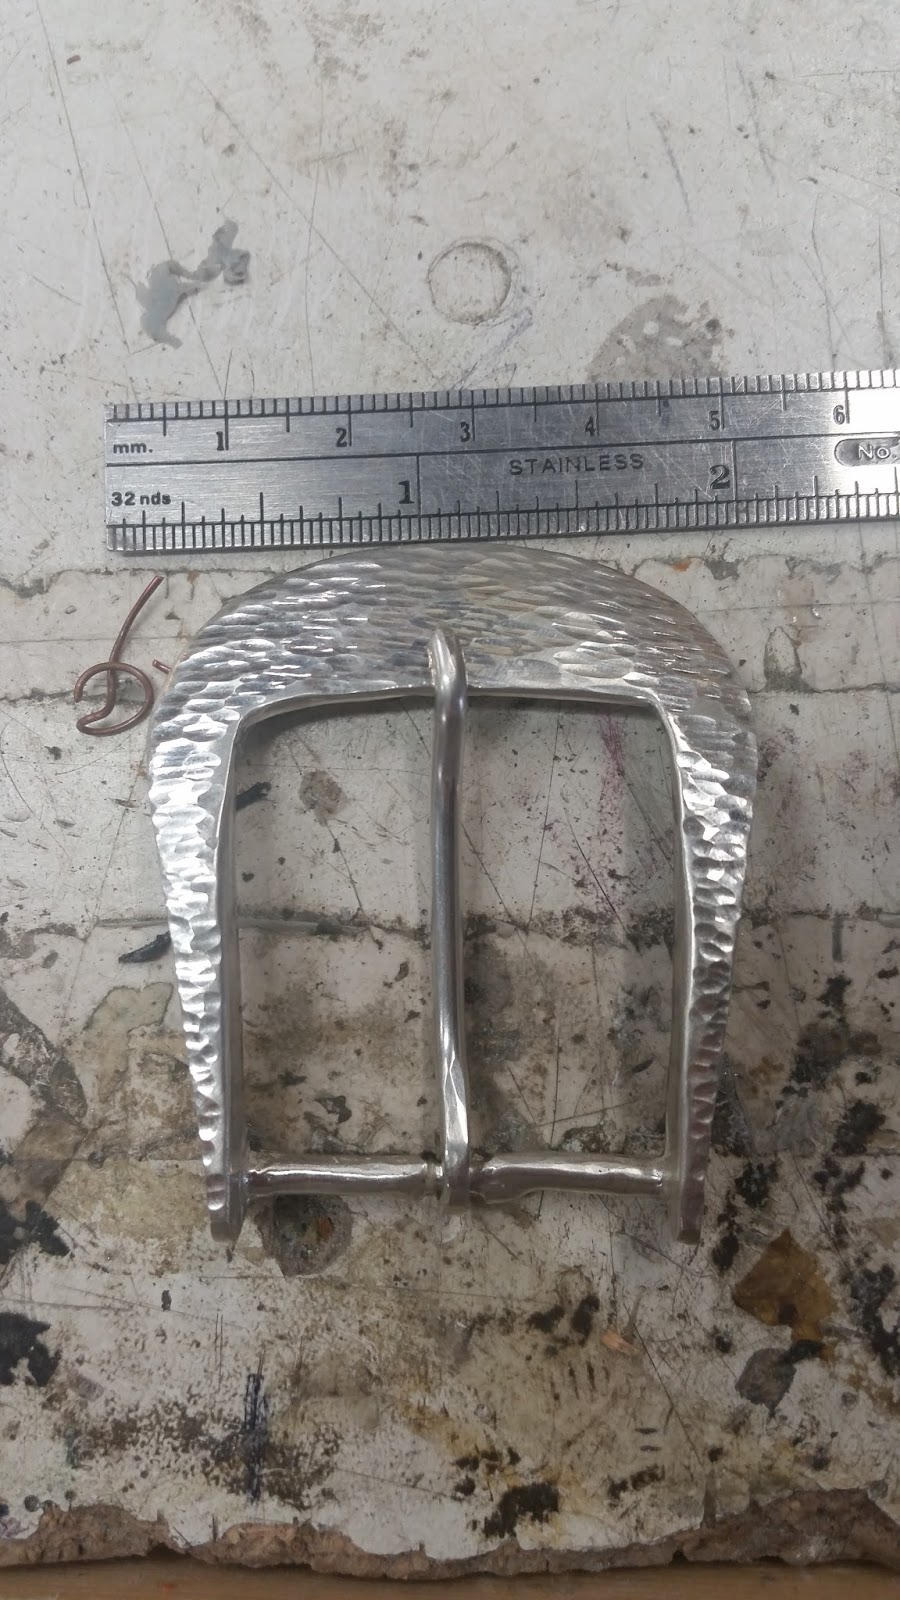
In order to do the hammered texture, the surface must first be smooth and polished.

 Ready for hammering.


 Top view of the finished piece.


View the final Explorer buckle in Sterling Silver on 1.5 inch brown cow-hide belt. 


Wednesday, September 28, 2016

Buckle Castings in Precess


 I'm running through a series of buckles. You can see the progress from rough castings to ready to patina and the finished buckles ready for this weekend show, my website or my etsy store.  This first photo is mostly rough castings with some sanding already started
this second picture is casting mostly finished and ready for patina
Here is some of them finished and waxed and ready to go  
I took this Blue crab claw buckle to the next level by giving it Multiple layers of different patinas. Blues, greens, browns and some black. The final step is wax. The Wax actually saturates the colors and give it depth.
The blue crab claw buckle before patina started
:
I'm tempted to keep this one for myself. But I'll take it to the show this weekend to give other people a chance and put it on the etsy store and website next Monday if it doesn't sell. If you see it and want to claim it before the show on Saturday just contact me and I'll send it to you. It's 95.00

Friday, December 27, 2013

Patina table

This is a shot of the patina table just before Christmas. Most of these parts are for earrings. They are copper and brass.  The brass are the green. There is also one bronze Redfish buckle that I was trying the red patina on. It's perfect for that buckle. 
This is a pair from that series. The parts are jointed so they move.  Sterling and brass