Many years ago I went to 5 day beach parties for new years several years in a row. During that time I started a tradition of making a new shot cup for the party. I have continued, over the years, to be interested in making silver cups. However not just for new years any more. Sometimes for special occasions or gifts or just for the fun of it because I had an idea I wanted to exicute
Top left is the New Year Chaser. This one was probably the most elaborate and complicated to make. It is a champagne cup on one end and a shot cup on the other. The double ended ball suspended in the middle "drops" when the cup is turned over, almost touching the point of the bottom cup but swinging clear.
On the right of the New Years Chaser is the Conch Cup. Sea shells an sea life have always fascinated me (as you can tell by my website)
This one is self explanatory but again, some tricky solder joins. On
of the most difficult things cannot even be seen in this shot. The feet
are tiny silver spirals that had to be soldered on near the end. Let's
just say it's hard to solder something small to something big.
The Tornado cup and the Bubble cup are some of the early designs. The tornado cup has gold balls swirling around the out side. This one proved to be difficult because it's one long piece of wire and that is one long solder joint to go top to bottom without any gaps or leaks and then soldering on the gold balls without re-flowing the whole thing was a challenge too. The "bubble" cup on the right was one of the first ones from the "beach party series". I liked the idea of it looking like there is no bottom yet it holds a full once.
The bubble cup on the left was done for the 4th of July. Again using the drilled out metal as a decorative design element. I have used this technique on several jewelry pieces over the years. On the right is a wedding cup done for a friend. They wanted lots of texture. I like the little feet on this one
This pair of shot cups are titled Scars and Strips
I used a course rasp file to get the texture on the out side and soldered on the copper and silver stripes cut from long strips of this material I made years ago for earrings and bracelet. That in it self is a good blog post. Its a pretty involved process of soldering and rolling. These 2 were done for the fun of it but have been sold.
I used this "box making" technique to go a step further and make a tea ball. I wrote a blog post on that one here.
I don't have any of these on my Etsy store or website but if your interested in on just comment here or contact me through the website
This is a journal of studio events, art shows, travels, ideas and works in progress for my jewelry adventures
Wednesday, October 3, 2018
Monday, August 13, 2018
Big Cuff Bracelets
These heavy sterling bracelets are designed for the rugged individual. I made them for the person who wants something totally unique but yet simple enough to wear comfortably with anything on a daily basis. The texturing is subtle but with age the contrast increases. I used a textured hammer to create the surface forged them from 1/8 inch thick (4mm) square sterling rod and 3/16 (5mm) square rod. No two are the same. These cuffs are medium to large for men or women. They can be slightly adjusted if I know your wrist size. I wear one myself!
Available on the etsy store here
Some of the raw material and the bracelets in process
Available on the etsy store here
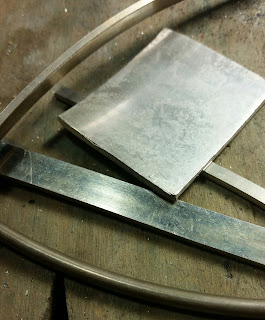
The process starts with a length of square sterling bar stock |
This is about 1/2 way through the forging, at this point I'll start working on the ends and then bend it to the right shape |
It takes a fairly heavy hammer to move this much silver |
I made 2 of from the smaller 1/8 inch stock and one each of the heavier 5mm 3/16 stock. the round rod in this picture were made into different designs not discussed here |
This is the heavy 1/8 (5mm) cuff |
Here I'm using the 2 different sizes of square silver to make these textured cuffs, 5mm and 4mm square rod. |
5mm square sterling rod forged | thinner on top and wider on the ends |
Available on the Etsy store |
The 5 mm square rod with the textured finish. Available on the etsy store |
2 of the lighter 1/8 square silver rod are on the etsy shop here There are one of each of the bigger designs
Monday, August 6, 2018
3 New Buckles Added to the Etsy Store
I recently added 3 new buckles to the ETSY store
this is the 1 1/2 inch Arrow head buckle in bronze. This is a wider version of the original 1.25 arrow head buckle carved down from the mold a found spear head.
This is the sterling version of the 1 1/2 inch Megalodon sharks tooth . I molded it from an actual fossil tooth found in the Tampa Bay area by a customer who dove for it in an area that was about to be built over with a condo. It was on its way to the natural history museum for their collection but he let me borrow it for a few days to make a mold of the front of it. It's a beauty. This one is also for 1.5 inch belts. I do a bronze and white bronze version of this but this is the first sterling one.
This is the white bronze version of the lab buckle for 1.25 belts. I have done this design in bronze and sterling so this is first successful white bronze casting. White bronze is harder to cast because of the pitting that occurs on the castings, It's very difficult to get a perfect casting in white bronze in this design, but this one came pretty close
Forest Life pendant with sugilite and Amethyst
This pendant was made for my forest life series. I used a heavily hammer textured piece of silver for the backing. It reminded me of a leaf that had been on the ground for some time. I forged a silver wire into the shape of a curling vine. The round amethyst at the bottom to finish and give the eye a resting and a way to keep from going off the design.
Setting the big stone |
Sunday, July 1, 2018
Picking Up Sticks: Aleatoric Design
"Aleatoricism is the incorporation of chance into the process of creation, especially the creation of art or media" (Wikipedia). Aleatoric design technique is something I have used a lot over the years in my jewelry and painting. I never knew there was a name for it, other than randomness, until Ted Lincoln told me about Aleatoric design.
I had the occasion to make 4 of these Pick Up Sticks necklaces for a gallery, Beaufort River Glass that carries some of my work and I thought it might be interesting to show the process. The original idea came from a random arrangement of parts on my bench. I was making earrings and I liked the way several of the same part randomly arranged themselves on the bench. It made an interesting design. With a bit of re arranging and some engineering, I came up with something that I could reproduce with some fidelity without changing the original idea too much and yet each one is different.
The process may be fairly obvious. I make the parts and solder them together. ( I always love instructions like that. How to make jewelry: make parts and solder them together) I make the parts by forging out round wire and melting the end with the torch. I make the final assembly in 2 layers and then solder the layers together. However the parts are never the same length nor do they develop the same curve when hammering or melt to the same length so besides the chance in the design there is also some randomness in the parts. They end up being about 2 inches wide and 2 inches long.
these are on my website here.
Parts of wire cut and shaped and starting to forge the ends |
Melting the ball on the end. This is why all the shapes don't end up the same length. |
Starting the assemblage of the parts to get the design arrangement. At this point I start to solder them together |
4 variations on the theme |
After
soldering and several steps of grinding and sanding they come to the
buffing wheel for the final high polish before assembling with black
cotton cord or sterling chain.
|
Variation one. This is the basic design and the one I do the most. I can come prety closr to this each time I do them now |
This is variation 2. There is still differences between each piece but I come close enough to these 3 every time. Each one is unique |
This is variation 3 . These are the 3 main variations that come out of this design. Which one is your favorite? all three are available here |
Monday, June 4, 2018
The Double Flare Buckle Set
Special blog and newsletter price 250.00
Father's day surprise. I'm trying something new. This is a thought I've had for a while. The idea that I could make something and sell it. Doesn't sound too radical right? Well the usual way this happens is quite different from that. In the past I would make things "on spec" and send them to galleries on consignment. It can take months or years for things to sell. Another direction is take the work to trade shows and hope to get orders from stores. Lots of expense and effort to get wholesale prices. Then I did art fairs for many years (still do some) I have to make lots of work and take it on the road and hope the conditions are right to sell some small part of what I bring. Any artist can write a whole book of Art Show Stories. Now I'm more "on line" where the time and effort is shoved in a different direction.
I started out with the question "what can I do with this pile of Heavy Sterling?"
I had a long bar of silver about 1/8 thick and 1.25 inches wide so I cut off a piece 2 inches long.
Here I'm bending the side plate with the hammer |
The basic box has been soldered together and the bar is soldered to the back end. The top plate was hammer textured and slightly domed. The side plates are now forged into shape to fit the arc of the top plate. Once soldered in place the top plate is ground to match the shape of the sides giving the buckle a flared design.
Keeper has also been forged into a curve using 2 hammer shapes . On the right I used a paper template to figure out how to bend the curved bar into a rectangle.
All the parts are soldered together and ready to start finishing.
The side panels have been ground into a taper to fit the thickness of a belt
The silver has been patinated and satin brushed to give a soft luster and show the texture.
Sunday, April 1, 2018
New pendants.
Starting on some new pieces
Four vine and leaf spiral pendants .
This has been a popular design even though I only made one. Since Michelle started wearing it lots of people have commented on it. (That could be more due to the model that the jewelry, but I thought I'd give some other people a chance to have one also. The original was done with amethyst these four have other stones. Here is a link to the etsy store
Peruvian Lapis |
Laramar |
saraphinite |
Subscribe to:
Posts (Atom)